A guide for Trekking Annapurna Circuit, Annapurna Base Camp and Poon Hill
The Annapurna Circuit, Annapurna Base Camp, and Poon Hill Trek in Nepal can be completed back-to-back in a sort of grand circuit (more on this below for all the relevant information) but they are three quite distinct routes that can be also done separately.
Together with Everest Base Camp they are undoubtedly some of the most popular and spectacular treks in the entire Himalayas.
I have personally completed all the treks, just mentioned, independently, without a guide and without porters, in the company of my dad! Whether you are a DIY-loving independent traveler or you are simply gathering information and then relying on some local agency or guide, in this blog you will find all the information and advice to do so. But first, as promised, let’s have some clarity:
- Difference between Annapurna Circuit, Annapurna Base Camp and Poon Hill
- Annapurna Circuit or Everest Base Camp
- Permits and visas needed to trek and enter Nepal
- When to go? Weather, temperatures, and best time
- Annapurna Circuit Trek
- Annapurna Base Camp Trek
- Ghorepani Poon Hill Trek
- Annapurna Circuit packing list
- Guide or DIY
- Food and accommodation overview of the treks
- Overview of trekking costs
- Safety along the trails
- Where to sleep in Kathmandu and Pokhara
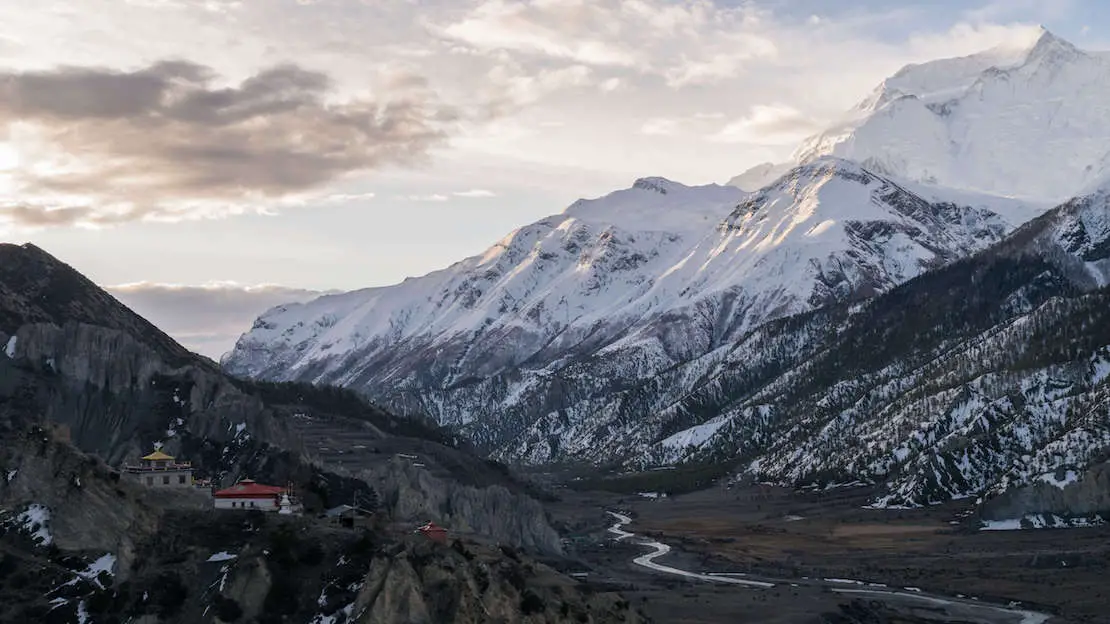
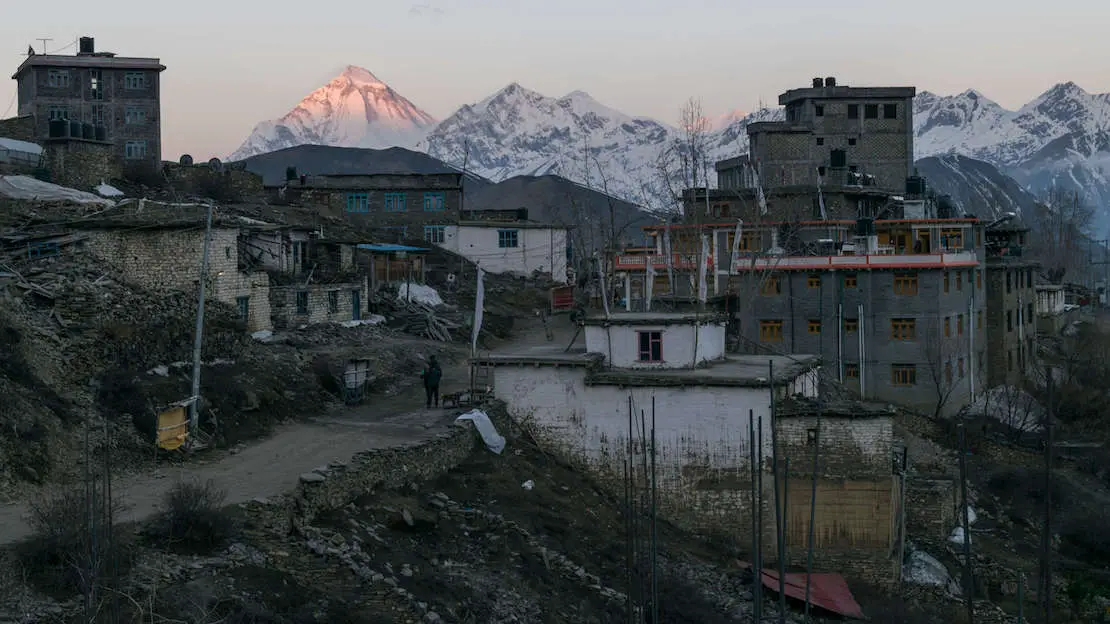
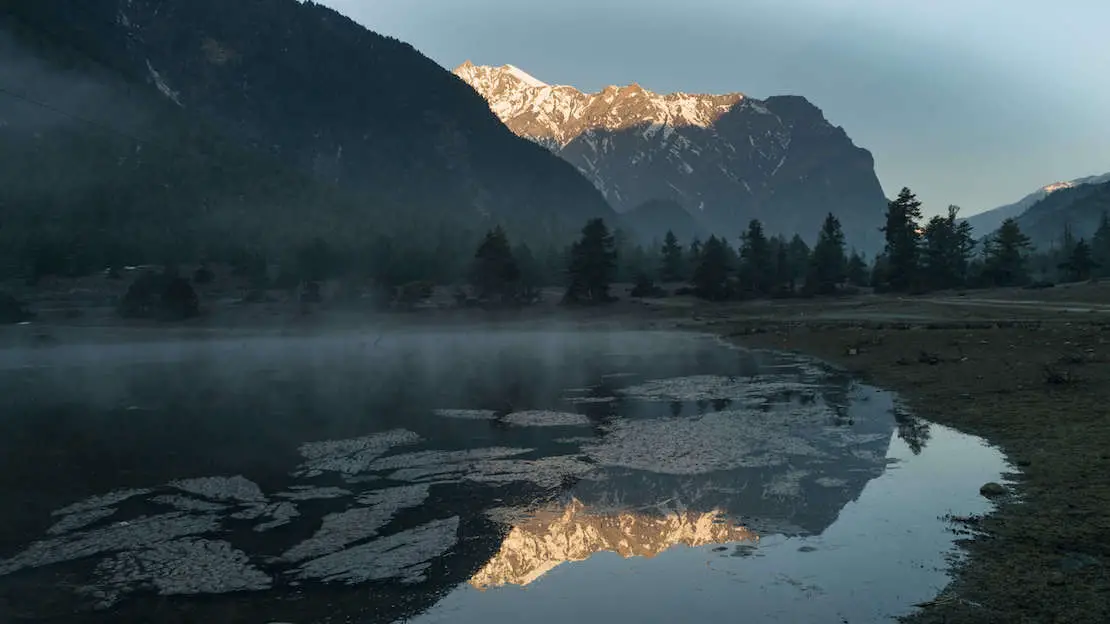
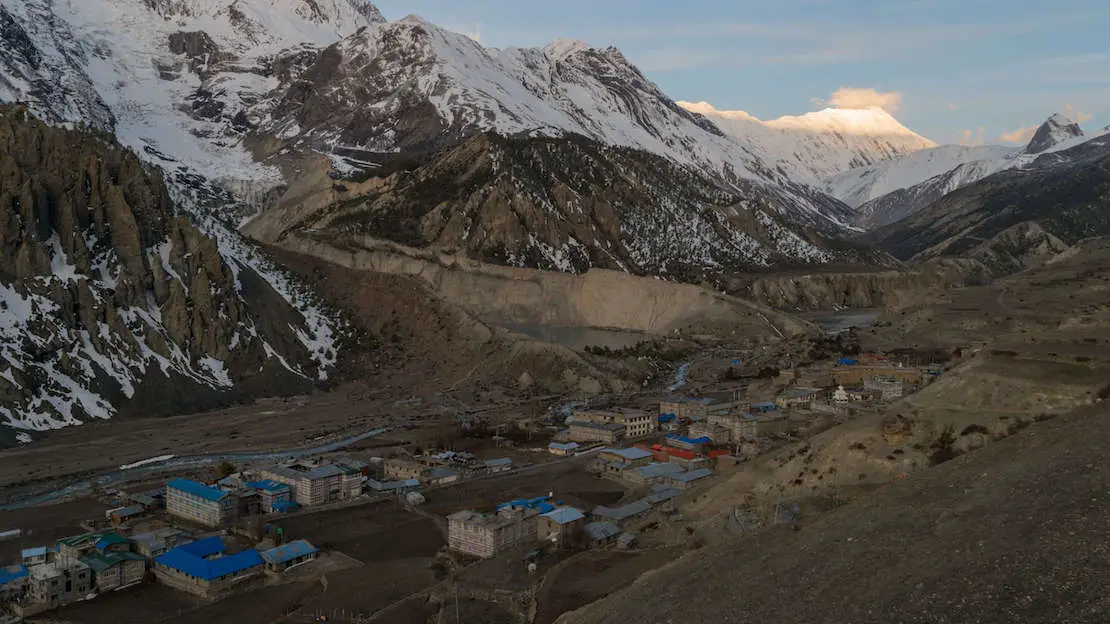
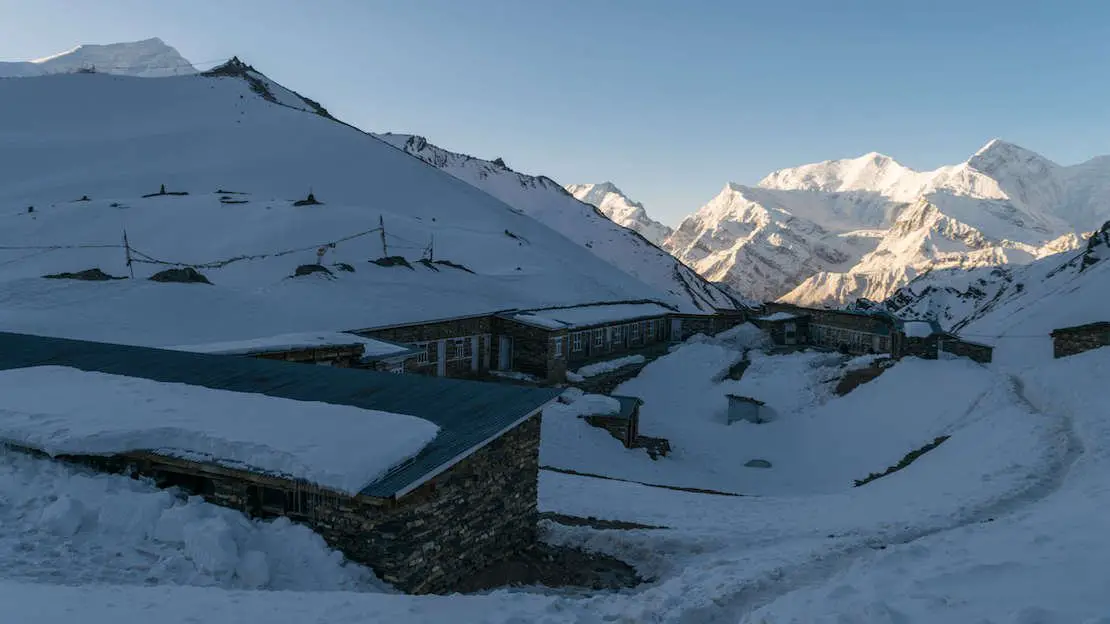
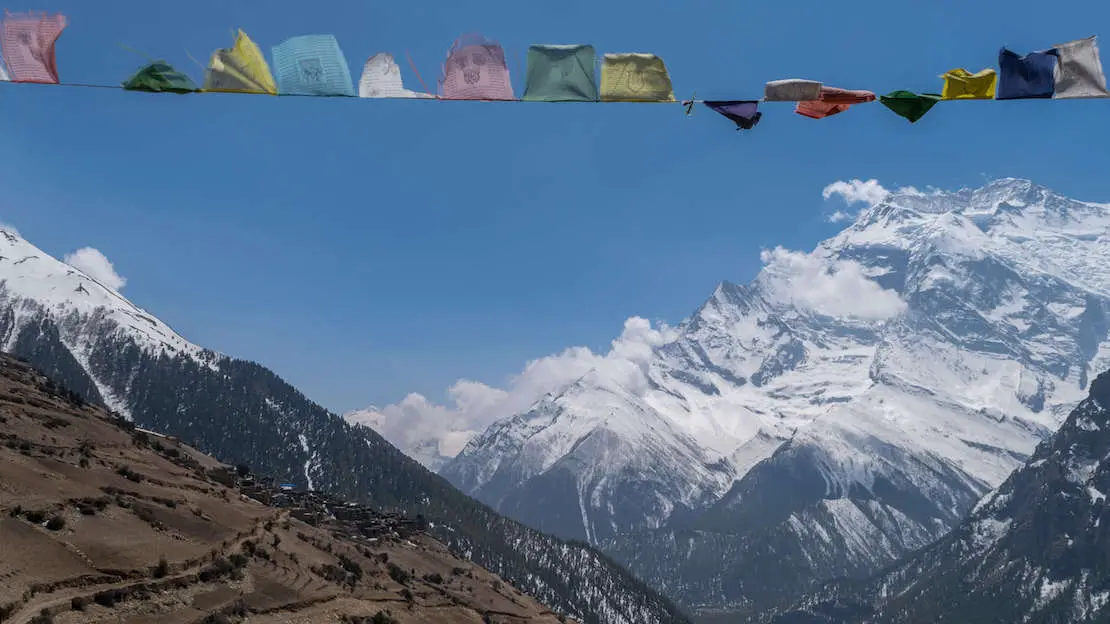
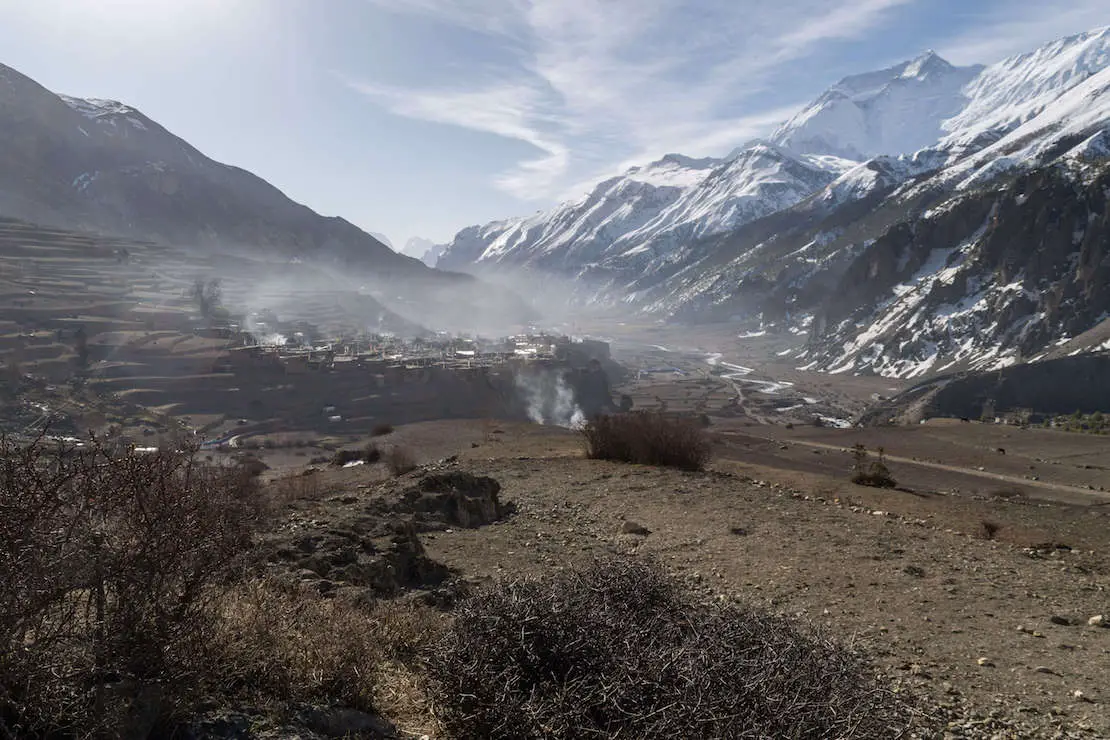
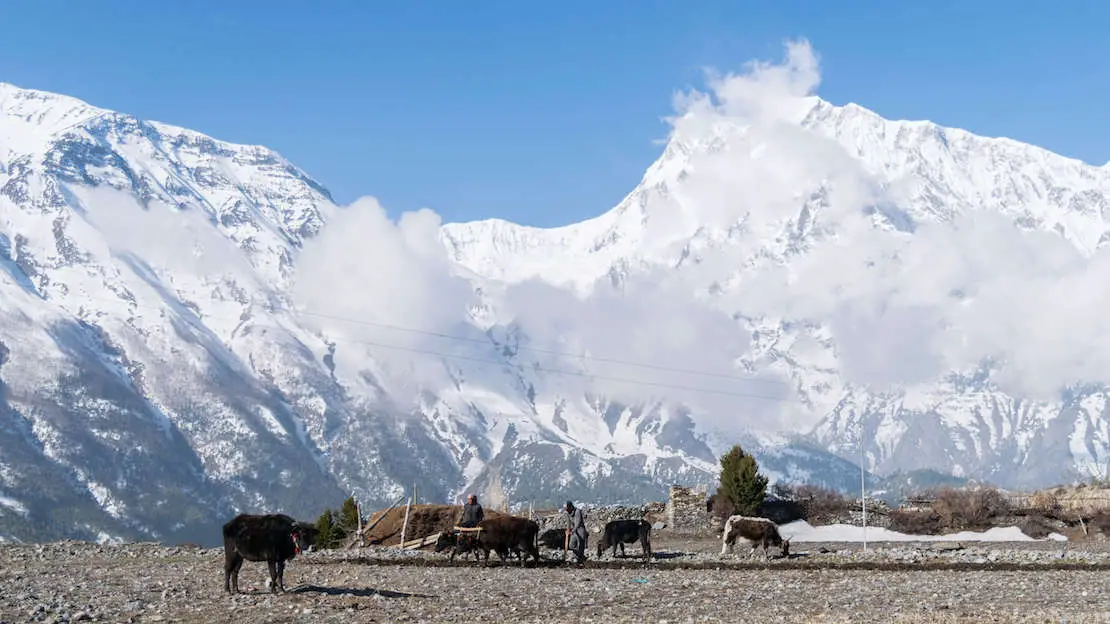
Sunrise in Manang.
In this guide, prices are expressed in the local currency called “Nepalese Rupee” often abbreviated simply as “NRP.” The exchange rate at the time of publication of this article is 1€ = 142 NRP. For the current exchange rate, I suggest you take a look at this page.
Difference between Annapurna Circuit, Annapurna Base Camp and Poon Hill
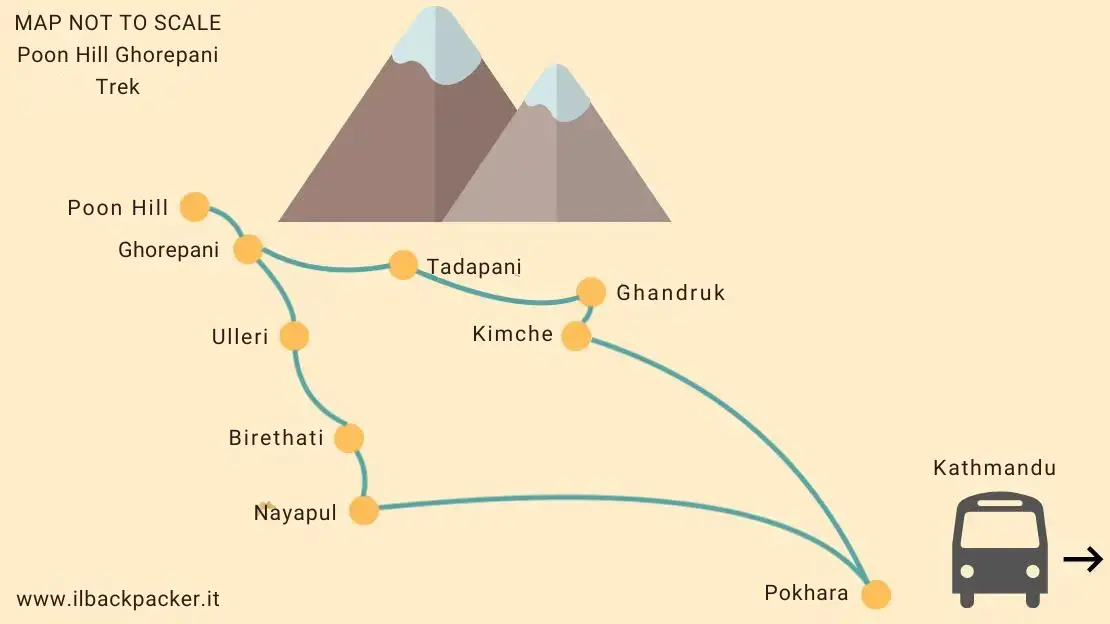
As mentioned above, the three treks are often confused with each other, with some thinking they are the same thing since many (myself included) end up doing them one after the other, basically combining them into one trek. However, this is actually not the case, and the map below should be quite explanatory in this respect.
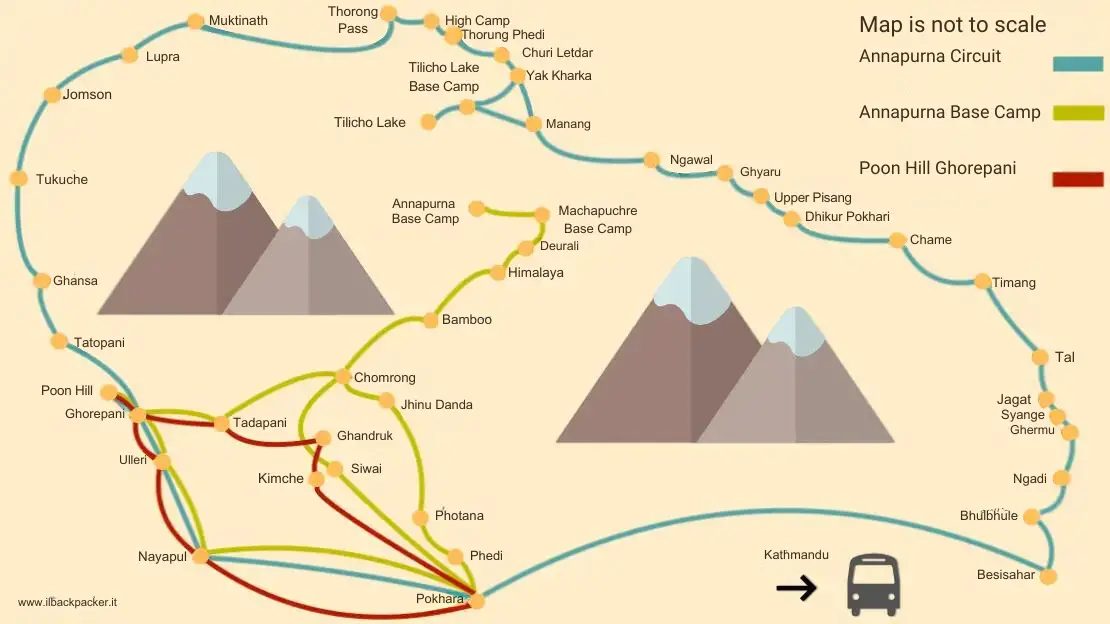
It is also important to consider that from 1977—when the area was officially opened to tourism—to the present day, the routes considered “standard” or at least common, have varied considerably, especially in the case of the Annapurna circuit, due to the absence of roads back in the days.
Now, the road that has largely replaced the original trail allowing for essentially endless start and end points along the circuit. The other two treks (Base Camp and Poon Hill) also offer more variations and can be combined with each other, in whole or in sections, as desired.
Here is a brief introduction to the three treks that I hope will shed some light.
Annapurna Circuit Trek
First of all, although it is a circuit and you can complete it in both directions, 99 percent of people do it counterclockwise. By doing so, the daily elevation gain is more gradual, and you have more time to acclimatize before tackling Thorung Pass at 5416 meters.
The original circuit started from Dumre village and ended in Beni, taking about 23 days to complete. As of today, only 5 of these days involve actual trekking; the rest of the route, if desired, can be completed by bus and jeep. However, completing it in five days remains unrealistic in terms of acclimatization, and it would mean missing most of the route.
It must be said, however, that in 2010, a project called NATT (New Annapurna Trekking Trail) was born, which provides an alternative route largely avoiding walking along the road. Some sections of the original route still do not have an alternative and are therefore skipped or truncated, greatly reducing the entire trail. With these changes, the circuit can be completed in about 10-15 days, depending on the chosen route.
In case you are interested in completing the NATT, here is a fantastic guidebook, from Besisahar to Nayapul, with precise instructions on how to avoid the road wherever possible. The travel time in this case is about 15 to 20 days.
As you may have guessed, no one starts from Dumre anymore; the new starting point is considered to be the village of Besisahar. However, many (myself included) end up taking a bus or jeep to one of the villages further up the valley. In my case, up to the village of Ngadi, 13 km further up, because this stretch (Besisahar – Ngadi) is certainly not spectacular and has to be done along the fairly busy, dusty road. Later in the guide, you will find all the information about possible starting points.
The ascent to Thorong Pass.
The arrival point, originally set at Beni, has also varied considerably over the years. As it stands, the vast majority of people finish their circuit in the village of Muktinath as soon as they cross the Thorung Pass. From here, it is indeed possible to take a bus or jeep back to Pokhara. Even here, however, the options are many, and I will try my best to list them.
With that, I hope you have a fairly clear idea of what is considered the Annapurna circuit. Now it is time to briefly talk about the other two treks.
The Annapurna Circuit at a Glance:
10 to 20 days depending on the chosen itinerary and one’s pace.
In terms of difficulty, this is undoubtedly the toughest of the three routes. If you ascend too quickly and are not in the best shape, the altitude can definitely take its toll, and the Thorung Pass at 5416 meters could be an insurmountable obstacle.
Nevertheless, it remains a trek that can be completed by many people. Some may need a few more days or perhaps the help of a porter, but if you are able to walk at least 4-5 hours a day for several days in a row, then you have a very good chance of making it!
Annapurna Base camp or Annapurna Sanctuary Trek (often abbreviated to just ABC)
First of all, all the names just mentioned basically indicate the same route. The trek, as the name implies, leads to Annapurna Base Camp (4130 meters). It is not a circuit, but essentially, you ascend and descend the same trail, with possible variations found only at the bottom of the valley. To sum it up, from Chomrong upward, there is only one trail, and this time there are no roads to avoid.
The entire trek can be completed in as little as 5 days starting from Pokhara. The fact that you “only” reach 4130 meters to the base camp makes it an extremely popular and relatively easy route. Undoubtedly, the trail to Annapurna Base Camp is the most traveled in the entire country; walking it without seeing any other trekkers during fall and spring is virtually impossible.
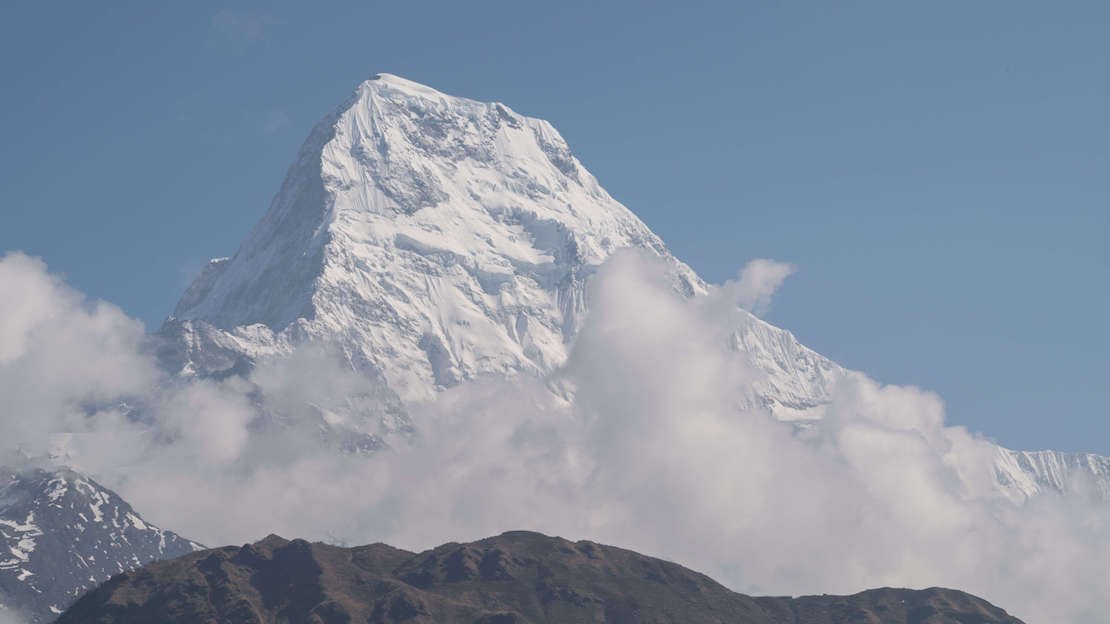
The Annapurna massif.
The trek to Annapurna Base Camp at a glance:
Five to eight days depending on the route you choose and, of course, your pace. The difficulty level is not high; the trail is extremely well-trodden, and the next lodge is never too far away. However, there is obviously some hiking to do. I have seen several obviously out-of-shape people make it all the way to the base camp, so with a little patience and tenacity, it is a doable route for many.
Poon Hill trek or Ghorepani Poon Hill Trek
Poon Hill is the easiest of the three treks, and to be honest, although it can be taken as a trek in its own right, it can actually be seen as the final part of the actual Annapurna circuit done Anti- Clockwise. The highest point reached during the trek is Poon Hill at 3210m, a “hill” that rises beside the village of Ghorepani and offers fantastic views of the Annapurna massif.
The route can be completed as a circuit, which makes it less monotonous than the trail to the base camp. Starting from Pokhara, 4 days are sufficient, which, together with the lower average altitude, makes it undoubtedly the easiest trek of the three. Its popularity is comparable to Annapurna Base Camp, with the difference that there are many local tourists along this route.
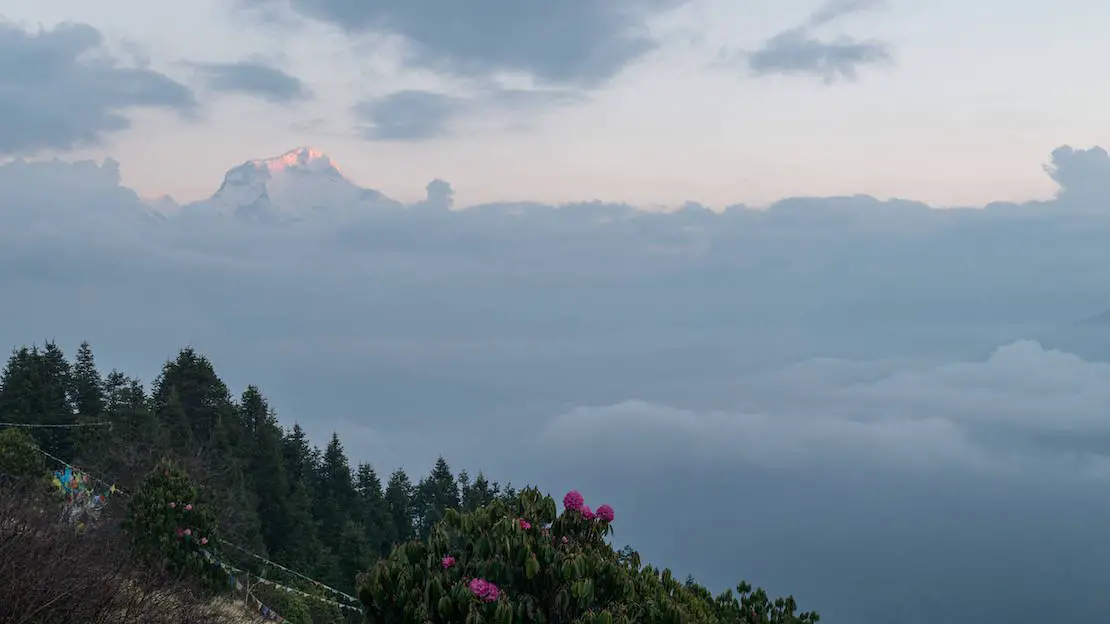
Sunrise at Poon Hill.
Poon Hill trek at a glance:
Four to five days are more than enough time. In terms of difficulty, this is undoubtedly the easiest route of the three. If you are able to hike 4-5 hours a day, you will have no problem completing it; altitude should not be a problem at all.
To conclude this brief introduction, as you will see below, it is possible to combine the three treks and complete the entire route in 20 to 30 days.
Annapurna circuit or Everest base camp?
If you’re reading this article, you’ve probably already made up your mind. However, in case you’re still debating what to do, I want to share a few words about what, for many, is a tough choice when you have perhaps only two weeks to trek in Nepal: Annapurna Circuit or Everest Base Camp?
First of all, they are both beautiful treks, but if I have to express my preference, I would opt for the Circuit as the scenery is much more varied. You start from an almost tropical climate all the way up to the 5416 meters of the Thorong La pass. Plus, being a circuit, each day is different, and you don’t have to follow the same trail up and down.
Two other things that make me lean toward the Circuit are that it is much less busy/popular than the Everest Base Camp trek. To use Dad’s expression after finding a real traffic jam near a suspension bridge, “It’s like being on the trail to the three peaks of Lavaredo!” (the most iconic trek in the Dolomites) And our experience was in the spring; I dare not imagine what the situation is like in the fall.
Another reason I would recommend the Circuit is the cost. Food and lodging are, on average, 30 percent cheaper than Everest Base Camp. Especially if you decide to complete the latter with a flight to Lukla (a practically forced choice if you only have two weeks to spare), then the Circuit will cost you practically half as much as Everest Base Camp.
Taking all this into consideration, Everest Base Camp still has its appeal, and the final choice is obviously up to you. What has been said so far is merely my humble opinion.
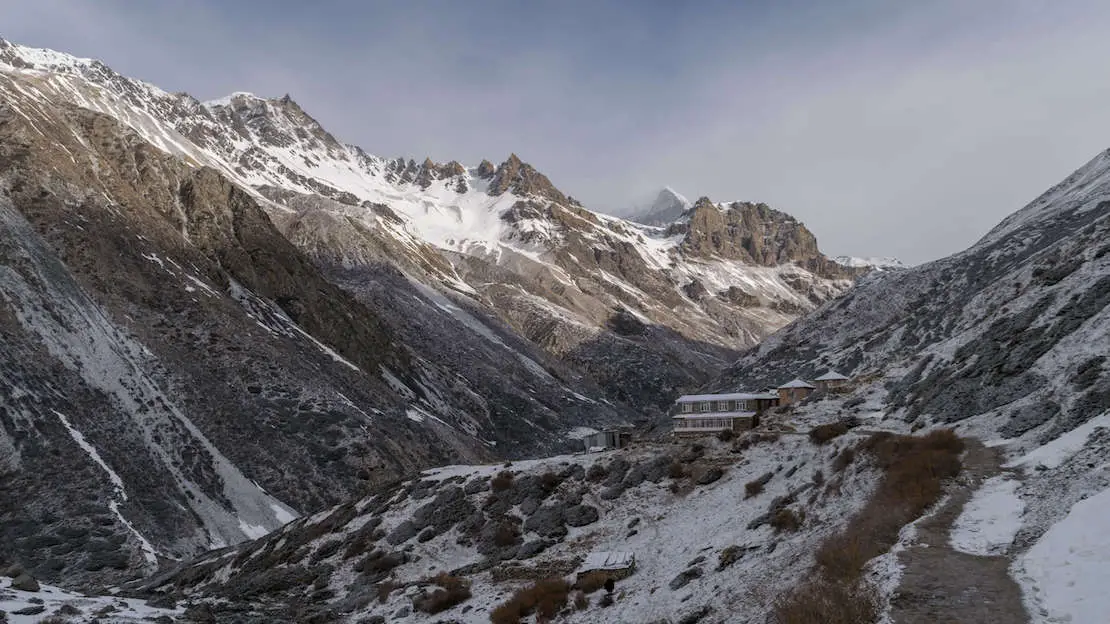
Just outside the village of Churi Letdar.
Permits and visas needed to trek and enter Nepal
Let’s start with the visa to enter the country. The visa is mandatory, but fortunately, most passport holders (with an expiration date of less than 6 months) receive a visa called Visa On Arrival (VOA) the moment they enter the country. The process is extremely simple and straightforward, but unfortunately, it is not free.
There are three options:
15 days – 30 USD.
30 days – 50 USD.
90 days – 125 USD.
The visa can easily be extended to a maximum of 150 days per calendar year (January 1-December 31), although it is not exactly cheap. You can find the costs here; it is probably best to leave and re-enter the country with a new visa. In any case, with a tourist visa, you cannot stay in the country for more than 150 days per calendar year.
Two passport photos (passport-size) are also officially required to complete the visa process once you arrive at the airport/land border. However, if you complete the form online they are not required and you will most likely save quite a bit of time upon arrival, especially at the Kathmandu airport where you can head straight to immigration without standing there filling out the form. I recommend that you do.
The visa at Tribhuvan airport can theoretically be paid by credit card, but in practice, from what I have read, it varies day by day. I tried it and was told it was not possible. All major currencies are accepted. To avoid unfavorable exchange rates, ideally, you should pay in U.S. dollars, but I wouldn’t dwell on it too much unless you already have them.
As for land borders (find the full list here) apparently only U.S. dollars are accepted, so adjust accordingly.
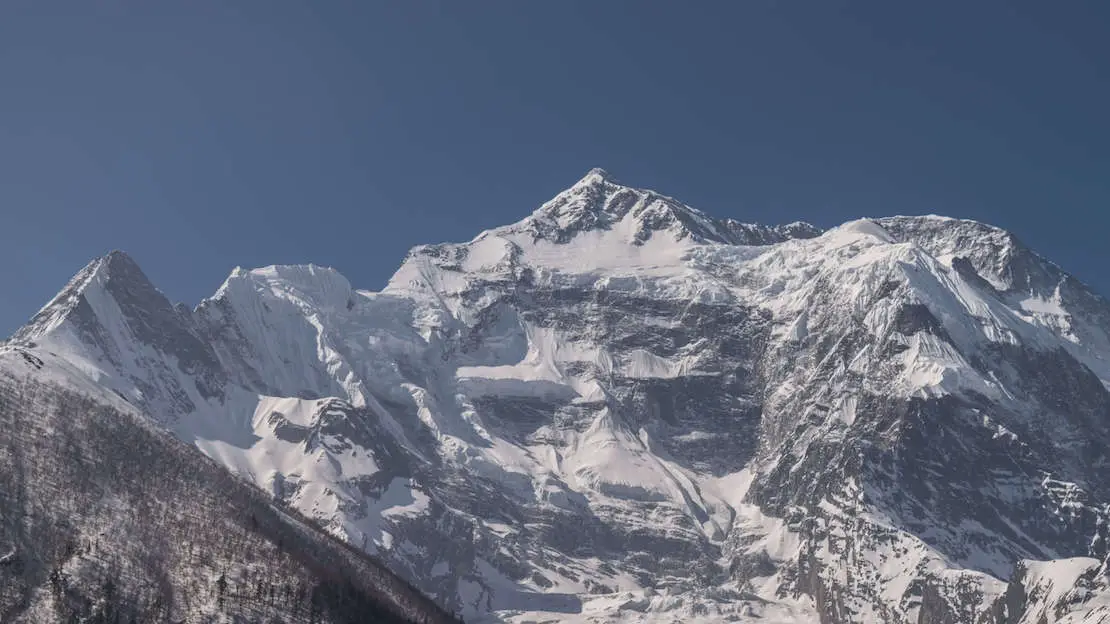
The summit of Annapurna 2 as seen from Upper Pisang.
Permits for trekking in the Annapurna region
Two permits are required to undertake the three routes I discuss in this guide (circuit, base camp, Poon Hill):
TIMS (Trekker’s Information Management System).
TIMS is essentially a body responsible for collecting general information on various trekkers, including routes. This is to facilitate possible rescue operations, as well as regulate trekking activities in the country. The permit is valid for one year and is also required for other treks (not Everest).
The cost is 2,000 rupees, about 15€.
N.b. Unfortunately, as of April 1, 2023, it should not be possible to obtain TIMS unless accompanied by a guide. In essence, completing any trek in the Annapurna region without a guide is technically no longer allowed. I think this is a real disgrace, yet another decision dictated by greed hiding behind “safety issues.”
Update October 2023:
A reader of the blog reported to me that they are not enforcing these new regulations. I report what she said: “At the checkpoints they ask if you are accompanied by a guide but even if you answer no, they just let you go through, that’s how it is for now.”
Update April 2024:
I met a traveler who confirmed what I just said above.
Update October 2024:
Apparently TIMS is no longer required for trekking in the Annapurna region.
ACAP (Annapurna Conservation Area Project).
ACAP is essentially the national park that encloses the Annapurna massif, within which all three routes described in this guide are located. It is the first national park as well as the largest protected area in the country.
The permit is valid for one entry only, so if you complete all three routes back-to-back, there is no problem. However, if, for example, you complete the circuit, return to Pokhara (thus leaving the park), and then want to do the base camp or Poon Hill, then you will have to pay again.
The cost is 3000 rupees, about 25€.
I recommend getting both permits in Kathmandu or Pokhara. Theoretically, you can also do it in Besisahar (at an increased price of 6000 rupees for ACAP; TIMS apparently cannot be done in Besisahar).
Doing it is really easy! In Kathmandu, you just have to show up at the Tourism Board, which is about 2 km from the main tourist area of Thamel (you can easily walk). The office is open from 10:00 a.m. to 5:00 p.m; I recommend showing up as soon as it opens to avoid unnecessary queues.
While the tourism office in Pokhara is located a short walk from the bus station, again open from 10 a.m. to 5 p.m.
Of course, you could also go to a local agency to get the permits, but the costs go up, and I don’t think it’s necessary. The process is generally quick, simple, and everything is issued on the spot.
Both permits require two passport photos (four in total), but at least as far as the Kathmandu office is concerned, they are taken for free on the spot, so I wouldn’t worry too much. I imagine it’s the same in Pokhara.
N.b. While filling out the forms, among the various information (passport number, itineraries, etc.), you will also be asked for your travel insurance number. The only three insurances to cover such an activity (that I know of) are World Nomads which allows you to insure trekking up to 6000 meters by adding it as an extra activity, TrueTraveller which by adding the “Extreme Pack” package offers coverage for trekking above 4600m, and finally SafetyWing which covers trekking up to 6000 meters by adding the “Adventure Sports” package.
Update October 2024:
Apparently it is no longer mandatory to show proof of travel insurance but I still recommend getting it.
In conclusion, Nepal does not require any mandatory vaccinations but Hepatitis A and B are recommended.
Weather, temperatures and best time to hike the Annapurna Circuit
Let’s start off by saying that with the right physical preparation and equipment, all three routes could technically be completed throughout the year. However, spring and fall are undoubtedly the best times to trek in the Annapurna region.
In summary:
Spring (March, April and May)
Temperatures are pleasant, and days are largely clear, except for a few rare days and late afternoons when peaks begin to be covered by clouds.
It is also the blooming season for yellow, red, and pink rhododendrons, which at low altitudes create a colorful scenery. After autumn, this is the second high season as well as the second best time (from a climate standpoint) to go hiking. I think it is the right balance between weather and crowded trails. At high altitudes and early in the season, depending on the year, you might find a lot of snow.
In case you are interested, May is also the time of the Tiji Festival in Lo-Manthang in the Upper Mustang region. The festival lasts three days and comes to life inside the king’s palace.
Summer (June, July and August)
Summer is the monsoon season in Nepal. Especially at low altitudes, it can get really hot, but the higher you go, the more pleasant the temperatures become. Much of the region sees a good amount of rain, with the presence of leeches and mosquitoes. However, there is a huge difference between the south-facing part of the massif (Base Camp and Poon Hill), where it really rains a lot, and the north-facing part (Manang, Upper Pisang, Muktinath), where the rainfall is definitely less.
The vegetation at this time is especially lush, wildflowers bloom, and rivers and waterfalls are at their best.
Basically, summer can be a good time to complete the circuit or otherwise devote oneself to the region north of the massif. It is a bad time for Poon Hill and Annapurna Base Camp; the trails way less crowded, and the prices are correspondingly low.
In case you are interested, during the full moon in August, you can attend the Yarlung Mela festival in Muktinath.
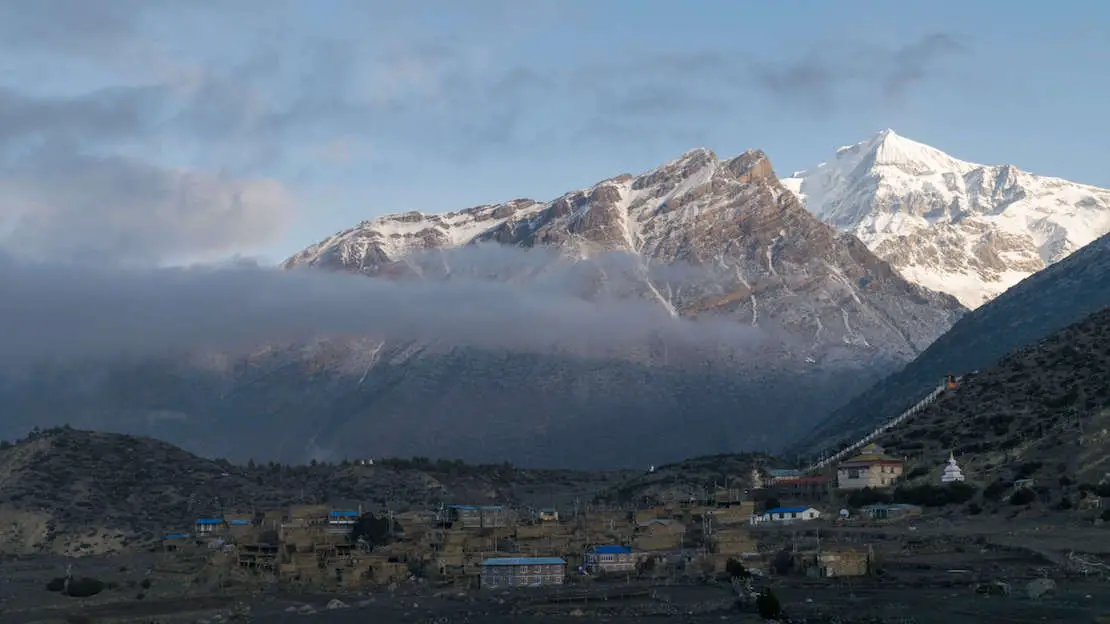
Sunrise in Muktinath.
Fall (September, October and November)
This is considered the perfect season for trekking in Nepal. After the monsoons, the days are clear, the temperatures excellent, and snow, even at high altitudes, is virtually absent.
It goes without saying that this is also by far the busiest and most expensive time of the year, especially the month of October. September can be slightly rainy, especially at low altitudes, while in November, temperatures begin to drop but still remain pleasant.
In case you are interested, autumn is also the festival season in Nepal. Two of the most important Hindu festivals take place at this time: Dashain and Tihar.
Winter (December, January and February)
During the winter period, it can get really cold, and especially at high altitudes, it is not advisable to trek given the likely abundance of snow. All in all, it remains a good season, especially at low altitude. Precipitation is not frequent, and days tend to be clear.
However, the Annapurna circuit is by no means advisable (Thorong Pass remains closed due to snow even until March), but Base Camp and especially Poon Hill can be completed without too much difficulty.
In case you are interested, the festivals during this period are: Tamu Loshar, Gyalpo Losar, and Mageshangrati, and Christmas is also celebrated.
Annapurna Circuit Trek
Before talking about the various starting points, here is a complete map of the circuit and a summary table of what are broadly the most popular routes:
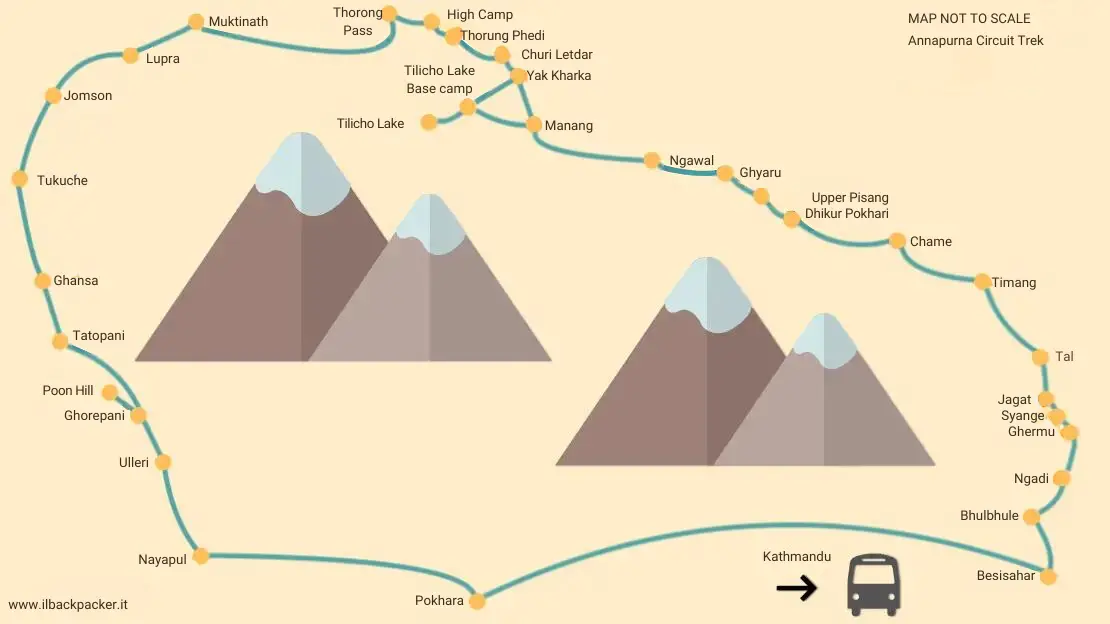
The most popular routes on the Annapurna circuit
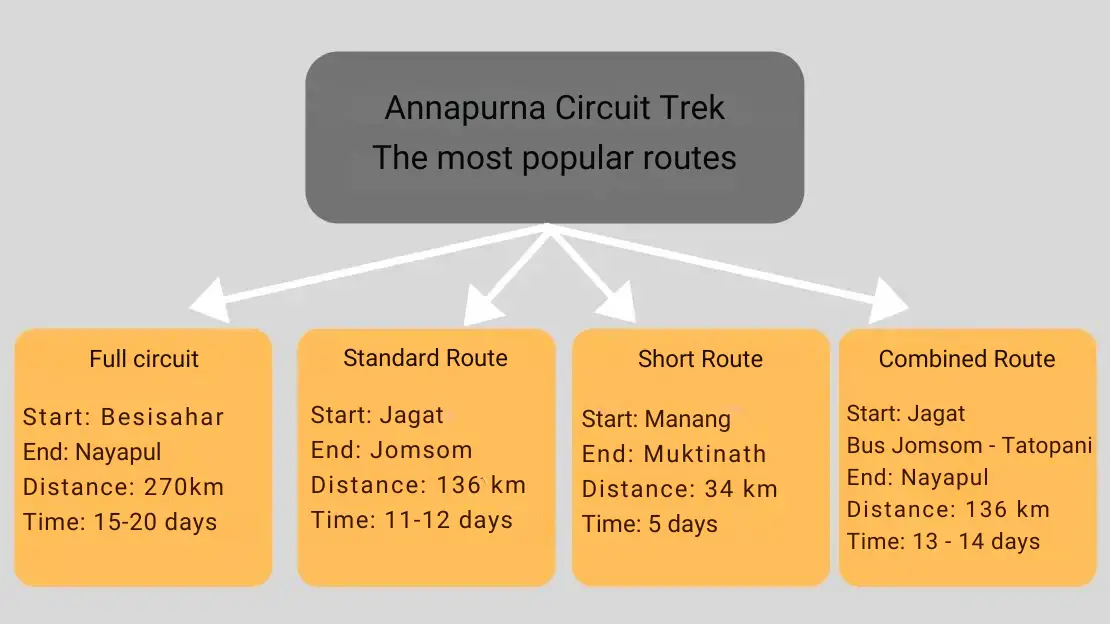
We opted for a sort of standard itinerary but without the section from Muktinath to Jomsom, preferring to add the trek to Poon Hill and the one to Annapurna Base Camp. Obviously, each option remains valid; the only one I would advise against is the Short Itinerary. Reducing the trek to just Thorong Pass would be a real shame, not to mention that climbing so high and so fast could give you problems with altitude.
In hindsight, I probably would have chosen to go all the way to Jomsom as both the view from the bus and from other travelers’ accounts, the route seems to be really scenic. While from Jomsom down, the scenery is similar to the first part of the circuit. So if you don’t have a lot of time, you could either skip it altogether or take the Jomsom – Tatopani bus and continue from there.
The various starting points of the Annapurna circuit
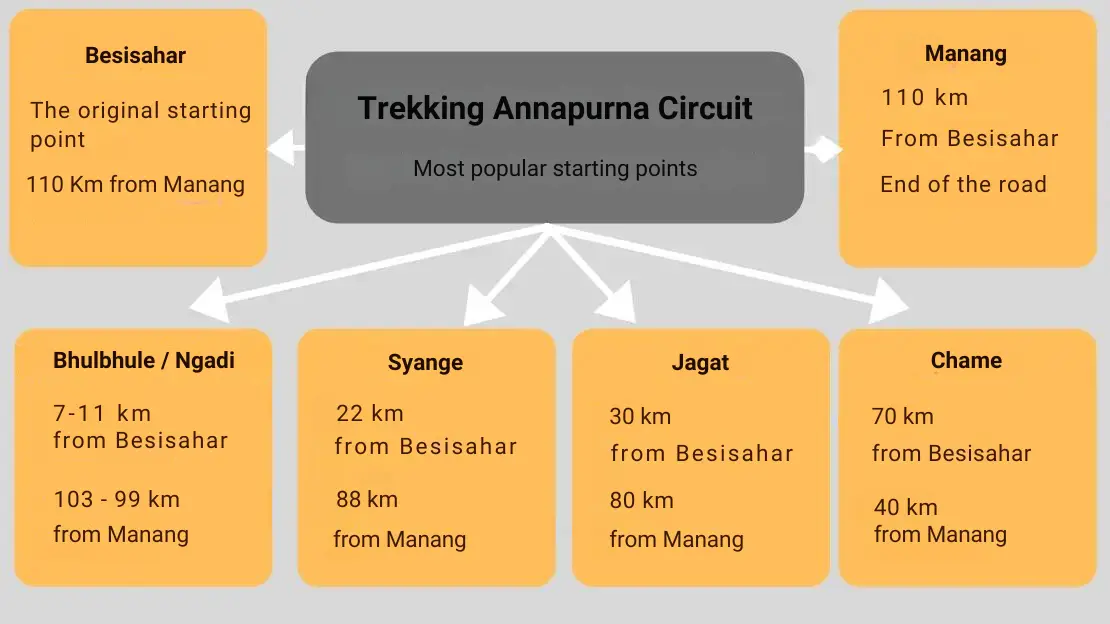
Basically, you can start your trek anywhere between Besisahar and Manang, but by bus, you can only go as far as Ngadi. From there, you either walk or take a jeep. Again, every option remains valid, but I strongly recommend not walking from Besisahar to Ngadi, as there is no alternative to the road, which is really busy and dusty in this stretch. Practically no one does it.
The two most popular starting points are Syange and Jagat, which are reached by jeep, with the latter usually preferred over the former. We opted for the bus to Ngadi, which translates, in broad strokes, into an extra day of walking. If you have time, I recommend it because the trail is really pleasant, and the bus is cheaper than the jeep.
Chame and Tal, slightly higher up, are two other viable options if you don’t have a lot of time. Beyond Tal, I personally don’t think it makes much sense.
The various finishing points of the Annapurna circuit
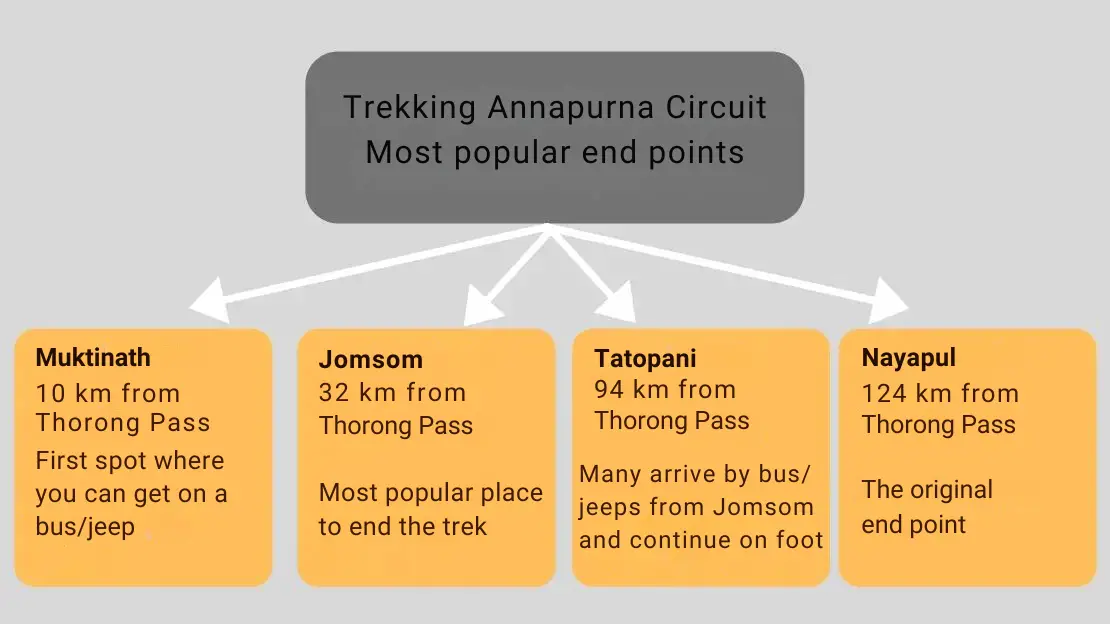
As with the starting points, there are several options for the ending points as well once over Thorong Pass. As mentioned earlier, we opted for Muktinath. From there, we then took a bus to Tatopani and started the trek to Poon Hill. Many people, once they get to Muktinath, go straight back to Pokhara.
Another really popular arrival point is Jomsom, from where, if desired and budget permitting, one can take a flight to Pokhara.The alternative is to take a Jomsom – Tatopani bus (a popular choice as many people think it is necessary to walk along the road but actually following the NATT does not require it) or a Jomsom – Pokhara bus.
Again, obviously, the choice is entirely up to you, but I think the two most viable options, especially if you do not have a lot of time, are Muktinath and Jomsom.
Day-by-day itinerary and recommended stops for the Annapurna Circuit
The following itinerary is designed so that you walk only in the morning to early afternoon (with a few rare exceptions) for a total of 5-6 hours per day and have lunch once you arrive at our destination. In principle, departure is around 7/7:30 and arrival around 13/14 at the latest. We are probably slightly faster than the average person, so if after the first few days the math doesn’t add up, adjust accordingly.
There are at least three good reasons to adopt this strategy:
1. The weather throughout the year is generally better in the morning, so better views and lower chances of rain.
2. Avoid taking a break: it doesn’t break your rhythm. Once you arrive at your destination, you will have plenty of time to eat, relax and recover.
3. Arriving at your destination and then having lunch will often save you money on the room. Ninety-nine percent of lodges, especially at low altitudes, are more than willing to offer the room for free in exchange for consuming the three meals, but if you stop to eat on the way, the meals become two, and the lodge may be more reluctant to give you the room for free.
Another thing to keep in mind is that you can actually stop almost anywhere along the way. Especially at low altitudes, the villages are all within a short distance of each other, and the recommended stops can be safely changed to the next village. Plus, even the lodges/tea houses between villages are frequent, giving basically endless possibilities to stop in case you are tired or just want to keep walking some more after arriving at your designated destination.
Finally, I recommend downloading Organic Maps, the app works offline after you download the maps and I think it is a great tool for completing treks.
N.b. The entire route is marked in red and white but I especially along the first part (indicatively from Nagdi to Timang) there are stretches where it is more convenient to walk along the road instead of following this signage that often takes you up a big elevation gain only to have you back down to the road a kilometer later. Always take a look at Organic Maps and consider whether it is really worth it.
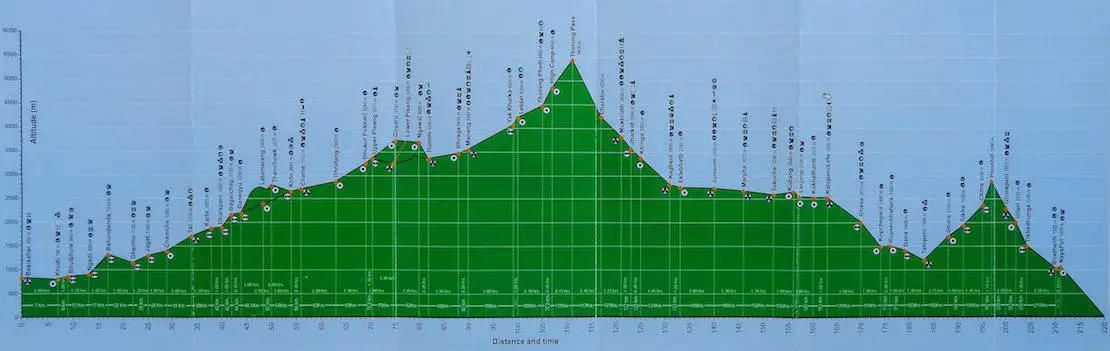
Elevation profile of the Annapurna circuit.
Day 1. Bus Pokhara – Besisahar (4 hours, 108km) or Bus Kathmandu – Besisahar (7 hours, 184km) / Bus Besisahar – Ngadi (1 hour, 13km) / Walk Ngadi – Ghermu (2:45 hours, 9.3km)
Besisahar (760m) – Ngadi (840m) – Lampata (1017m) – Bahundanda (1223m) – Ghermu (1108m)
We passed through Pokhara as we had time and thought that breaking up the trip was a good idea, but it is not absolutely necessary to do so. In fact, in hindsight, perhaps I would have opted for the direct bus from Kathmandu.
From Kathmandu, the bus leaves from Gongabu Bus Station (Gongabu Bus Park), and the cost is 500/600 rupees. There are several daily departures, but I recommend leaving early in the morning (the first bus should be at 6:45 a.m.). Go to the bus station the day before, buy your ticket, and confirm your departure time.
If you want to go through Pokhara instead, the Kathmandu – Pokhara bus leaves at this point, almost all accommodations/agencies charge 700 rupees but we managed to get two tickets for 1300. On the other hand, the Pokhara – Besisahar bus leaves from the Tourist Bus Park (Kathmandu – Pokhara bus arrival point) first departure at 7:00, we paid 500 rupees each through the hotel but apparently you can pay less.
From the last stop in Besisahar (where everyone gets off), you can arrange jeep transportation to any destination along the way. However, I recommend waiting for the local bus that passes frequently and continuing to Ngadi (last stop). The cost is 300 rupees. If you wanted, you could get off at Bhulbhule (200 rupees) and continue on foot, but you would be walking along the road and honestly not missing anything. On the other hand, if you don’t have time, or simply want to start higher up, this is the time to take a jeep to one of the other starting points.
In principle, if you decide to reach Syange or Jagat by jeep within this day, you can still follow the itinerary to the letter by changing only the starting point on day 2. In any case, keep your permits handy as there is the first checkpoint at Bhulbhule. I did not know this and had to climb on the roof of the bus to get them from my backpack.
From Ngadi, the trail to Ghermu is really nice and I recommend it. We spent the night at the Crystal Lodge, with a free room, Wi-Fi, and hot shower, only paying for dinner and breakfast. The guy, however, the next morning charged us 10% of the total as service. It was the first night and we did not know, but this is definitely not the norm. No one else along the trail even tried, so there are probably better options in the village.
The path leading to Ghermu.
Day 2. Walk Ghermu – Tal (5 hours, 15 km)
Ghermu (1108m) – Jagat (1250m) – Chyamch (1367m) – Tal (1633m)
If you start from Syange/Jagat, it’s about 1 km and 4 km less, respectively, so it’ll probably take 4 to 4 1/2 hours to reach Tal.
From Ngadi, if you wanted, you could stay at a higher elevation and take an upper trail that avoids the road completely but is much tougher and lengthens the route by 3 km. Alternatively, you could go down to the village of Syange, crossing the river, and follow the road to Chamje. From there, you cross the river again and join the trail to Tal.
We opted for the road, and honestly, it was no problem at all. It may be that early in the morning there is still little traffic, but along the 7 km or so of road from Syange to Chamje, no more than 10 jeeps passed by. Along these 7 km, it’s also possible to take small detours that lead you onto paths that run parallel to the road, but they are all basically pointless ups and downs. After trying the first one, we stuck to walking along the road.
At Chamje, you cross the river again and walk for a couple of kilometers along a really pleasant trail before the final ramp to the village of Tal.
In Tal, we spent the night at River View Guest House. Again, we got the room (with bath and hot water) for free in exchange for the cost of meals, but there was no wifi.
Jagat village.
Day 3. Walk Tal – Timang (5 1/2 hours, 13 km)
Tal (1633m) – Karte (1781m) – Dharapani (1844m) – Odar (2131m) – Bagarchhapad (2059m) – Danque (2139m) – Timang (2578m)
From Tal, I strongly recommend walking along the trail that, with its back to the village, runs on the right side of the valley (while the road runs on the left side on the other side of the river) to the village of Dharapani where the road and trail rejoin. The trail is slightly harder than the road, but the views are worth it, and all in all, it is a really pleasant stretch.
From Dharapani to Timang, I recommend walking along the road. There are a few marked shortcuts worth taking, but for the most part, follow the road.
Timang is a really nice village surrounded by mountains. We slept at Hotel Manaslu, which offered nice rooms, a great hot shower, and wifi, all for free, paying only for meals.
Chame village.
Day 4. Timang – Dhikur Pokhari (6 hours, 20 km)
Timang (2578m) – Chhitepu (2636m) – Koto (2656m) – Chame (2726m) – Talekhu (2838m) – Bratan (2932m) – Dhikur Pokhari (3211m)
On this day, we mostly walked along the road, but I must say that once again it wasn’t a problem at all: there was virtually no traffic, and every now and then, there was a chance to take the path that runs alongside the road.
The route up to Brathang is relatively easy, with some flat stretches, and then it begins a steady climb to the village of Dhikur Pokhari.
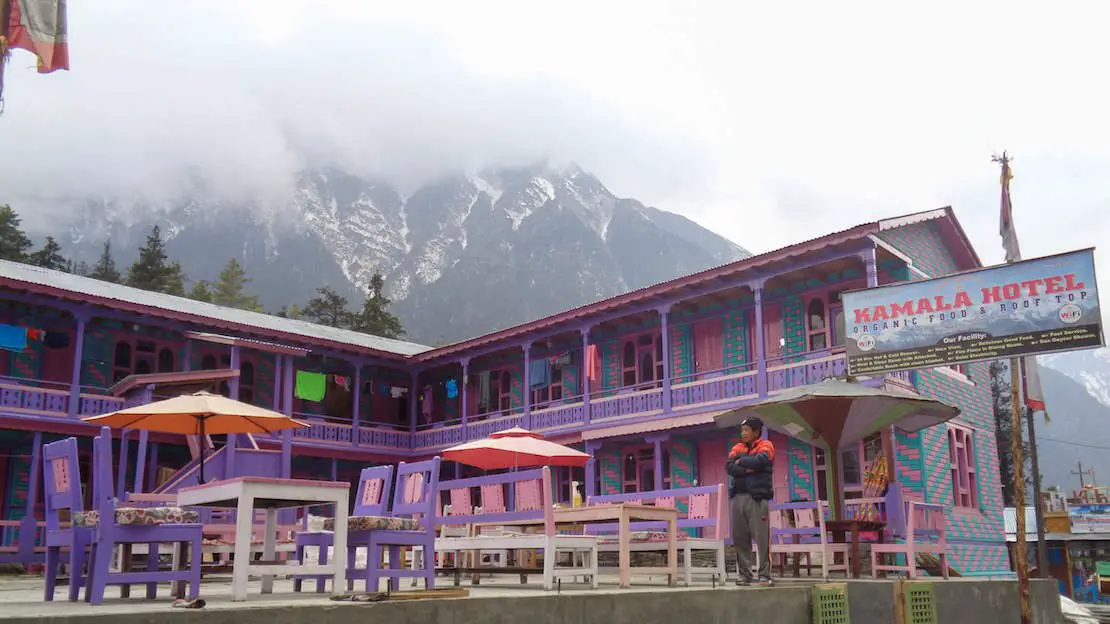
We stayed at Hotel Kamala, and again, I would recommend it. The room was nice, and we got free wifi by paying for meals. They also offered a hot shower for a fee.
Sunrise at Dhikur Pokhari.
Day 5. Dhikur Pokhari – Ngawal (5 1/2 hours, 14 km)
Dhikur Pokhari (3211m) – Upper Pisan (3303m) – Ghyaru (3695m) – Ngawal (3669m)
From Dhikur Pokhari, you have two options: follow the signs toward Lower Pisang and walk along the road to Manang, or head toward Upper Pisang and take the trail that runs at a high altitude (reaching almost 4000m elevation) along the other side of the valley. I strongly recommend the second option; the trail is really scenic. But if you’re not feeling fit, it’s probably best to avoid overdoing it and continue to Lower Pisang.
Another thing you could do is aim for Upper Pisang (from where there are fantastic views of Annapurna 2) and then descend to Lower Pisang before continuing down the road to Manang.
From Dhikur Pokhari to Upper Pisang, the trail is almost flat and really pleasant, but once out of the village, there is a nice ramp (400 meters of elevation gain) to the village of Ghyaru. Ghyaru is a really pretty village; all the structures are made entirely of stone, and it’s worth exploring briefly.
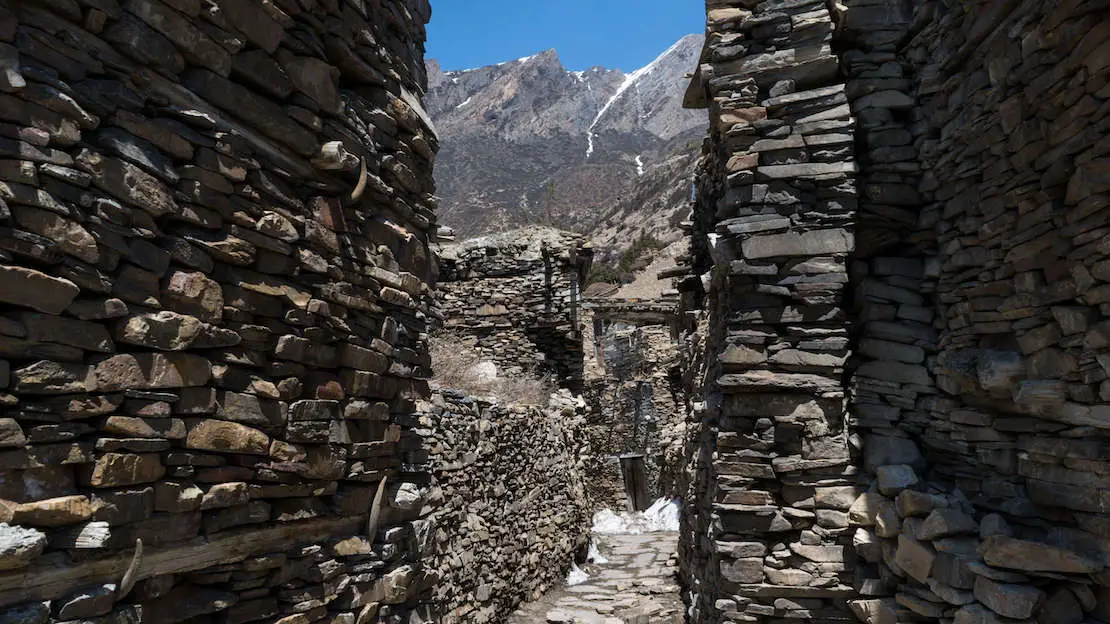
Ghyaru village.
From Ghyaru to Ngawal, the trail is basically an extremely walkable false flat with spectacular views of the Annapurna massif. This was the section I enjoyed most of the entire circuit.
In Ngawal, we stayed at the first (literally) lodge at the entrance to the village. Again, there was free wifi and room, and we paid only for meals. Hot showers were available for a fee. The family was really nice, and the food was great, but the facility was not the best, especially compared to those we saw later that day.
Note: During this day, many people prefer to push on and reach Manang. However, doing so makes for a really long day. If you’re not in a rush, I would advise against it. But if you decide to do it, simply skip day 6 and go directly to day 7. The same applies if you decide not to opt for the upper trail; reach Manang in the day and go directly to day 7.
Ngawal village.
Day 6. Ngawal – Manang (2:45 hours, 9 km)
Ngawal (3669m) – Munchi (3500m) – Braga (3519m) – Manang (3560m)
This is a semi-rest day. From the village of Ngawal, you have two options: take the trail that descends into the valley just outside the village and rejoins the road at Mungii, or stay at altitude a little longer and descend to Braka.
The first trail is better marked, well-traveled, and shorter; most people choose this option (including us), despite our initial plan to take the other one. We followed the trekkers in front of us, but if you pay attention and check Organic Maps, the second one is probably more scenic. Nevertheless, it makes little difference in the end.
Arriving at the bottom of the valley, we walked along the flat road to Manang. Before finding free lodging where we only had to pay for meals, we had to inquire at a couple of places. Eventually, we struck a deal with the Himalayan Singi Hotel, which offered a room with a bathroom, hot shower (solar-powered), and free wifi. This arrangement allowed us to pay only for the six meals. We decided to stay two nights to acclimatize, which is highly recommended.
With the short walk of the day behind us, we spent the afternoon exploring the town and nearby Gangapurna Lake.
Manang village.
Day 7. Manang (Rest day / acclimatization)
Even if you feel physically well, it’s highly recommended to spend the day in Manang and avoid ascending further to prevent problems in the following days. However, it’s advisable to take a short hike nearby to pass the time and aid in the acclimatization process. As the famous English saying goes, “climb high, sleep low.” This means it’s best to gain elevation during the day and then descend to allow the body to recover.
For this purpose, there are several options around Manang (see the map below). The two I would recommend are the ChongKor viewpoint and the Praken Gompa. Both are 2-3 hour round-trip hikes, perfect for gaining a few hundred meters in elevation and then spending the rest of the day resting.
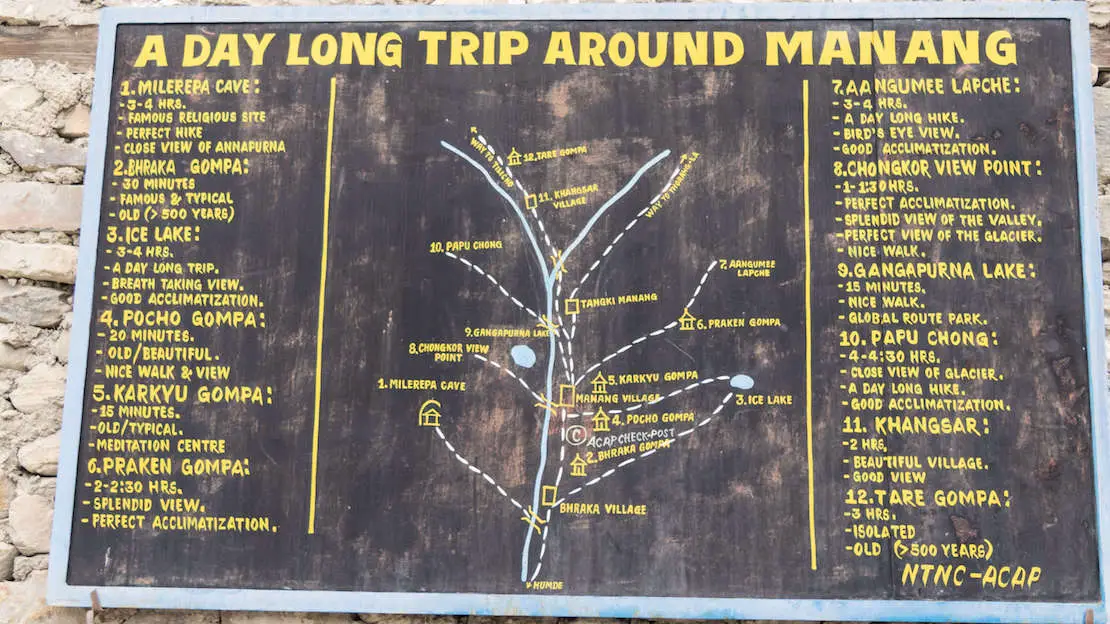
Map of excursions in Manang.
We chose ChongKor and enjoyed the views (the glacier view is excellent), but Praken Gompa on the other side of the valley also seems to be a good option; both are at about 3900m. Another popular, albeit more challenging, choice is to visit Ice Lake at an elevation of 4200m.
Finally, from Manang, you may decide to climb to Tilicho Lake, the highest lake of that size in the world, although it’s not part of the official Annapurna circuit route. If you have two extra days available, you could reach Tilicho Lake Base Camp in one day, ascend to the pass, and then resume the circuit route the next day after visiting the lake. Alternatively, you could continue on to Jomsom without retracing your steps along what is a less-traveled variant that essentially cuts through the Manang-Jomsom section.
We intended to take the two-day variant, but in mid-April, the trail was still closed due to snow, which was unusual but entirely possible.
Note: If you’re not feeling particularly fit due to the altitude, Manang is an ideal place to spend a few extra days recuperating before continuing the trek. Some even spend a third night in town. Manang is also an ideal place to buy any missing equipment, as this is where the road ends and prices are still competitive. Once you leave the city, the availability of equipment changes.
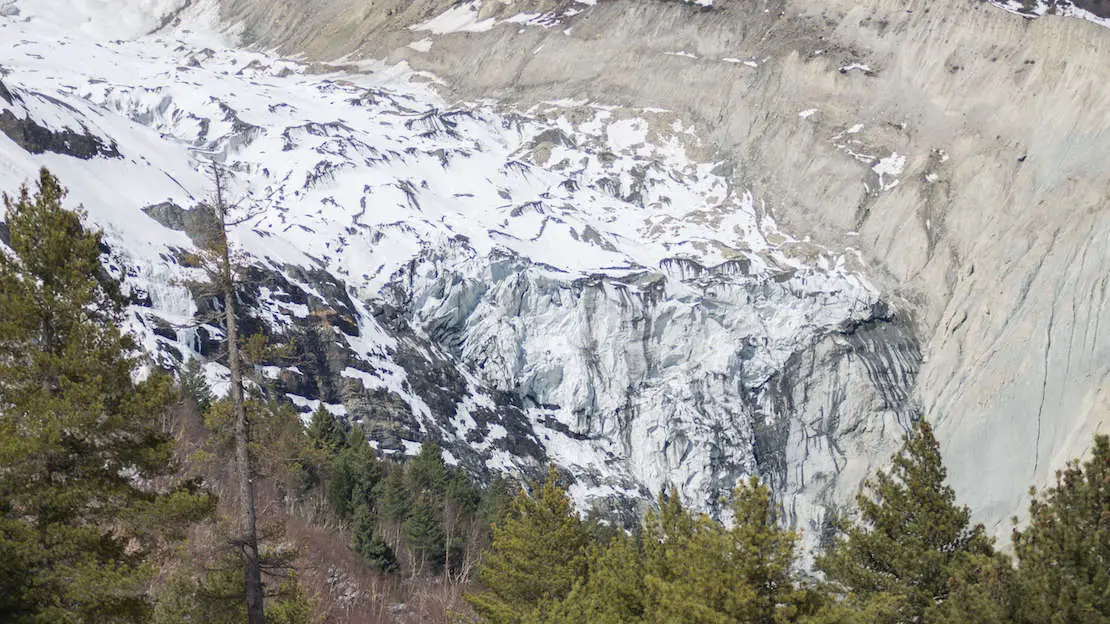
ChongKor viewpoint.
Day 8. Manang – Churi Letdar (4:30 hours, 11 km)
Manang (3560m) – Tengi (3719m) – Ghunsang (3947m) – Yak Kharka (4050m) – Churi Letdar (4248m)
The ascent to Churi Letdar is truly enjoyable. The initial stretch offers beautiful views of Manang at the valley bottom, while the subsequent partly flat section provides excellent views of the surrounding peaks and numerous eagles before reaching Yak Kharka, where the final ascent begins.
Churi Letdar sits at 4200m, compared to 3500m in Manang. At this altitude, it’s recommended not to gain more than 500 meters per day. We had no issues with this, but if you’re not feeling particularly fit, another popular stop is the village of Yak Kharka at 4100m, about a kilometer before reaching Churi Letdar. Sometimes, even a difference of 100 meters can make all the difference!
We stayed at the SnowLand Lodge here, with a complimentary room and wifi, paying only for meals. While the facility isn’t exactly new, the view is fantastic, and the staff is friendly.
Entrance to Churi Letdar village.
Day 9. Churi Letdar – High Camp (3:45 hours, 6 km)
Churi Letdar (4248m) – Deurali Tea House (4440m) – Thorung Phedi (4548m) – High Camp (4884m)
The first slightly uphill section is really pleasant, with excellent views. Then, you descend to cross the river, regain altitude (not fun at this elevation), and walk along a flat stretch to Thorung Pedi.
From Thorung Pedi to High Camp, there is a short but tough climb, so take your time! I recommend leaving early in the morning. Especially during the high season, the risk of being without a room and having to sleep in the common area of High Camp is high if you arrive late, as there is only one facility that, although large, has a limited number of rooms. Here, sleeping for free by paying only for food is impossible; our double room cost us 350 rupees each.
In the afternoon, if you feel like it, you can hike up to the nearby viewpoint that offers a great 360-degree view of the valley. It’s only about a ten-minute walk and is especially popular for seeing the sunrise, but we didn’t have the willpower to get out of the sleeping bag at that hour.
An alternative that seems to be quite popular is to sleep at Thorung Pedi, but I honestly don’t think it’s a very good idea as it would make the next day, which is already the toughest and longest of the entire circuit, even tougher.
However, there is a point to be made that sleeping at a lower altitude before tackling the pass might benefit someone who has problems with altitude and is not feeling particularly well. Some even spend one night at Thorung Pedi and one night at High Camp before tackling the pass. Basically, listen to what your body tells you, but if you feel good, I think the night of day 8 is best spent at High Camp.
Sunrise at High Camp.
Day 10. High Camp – Muktinath (7 hours, 13 km)
High Camp (4884m) – Thorong La Pass (5416m) – Chambar Bir (4200m) – Muktinath (3611m)
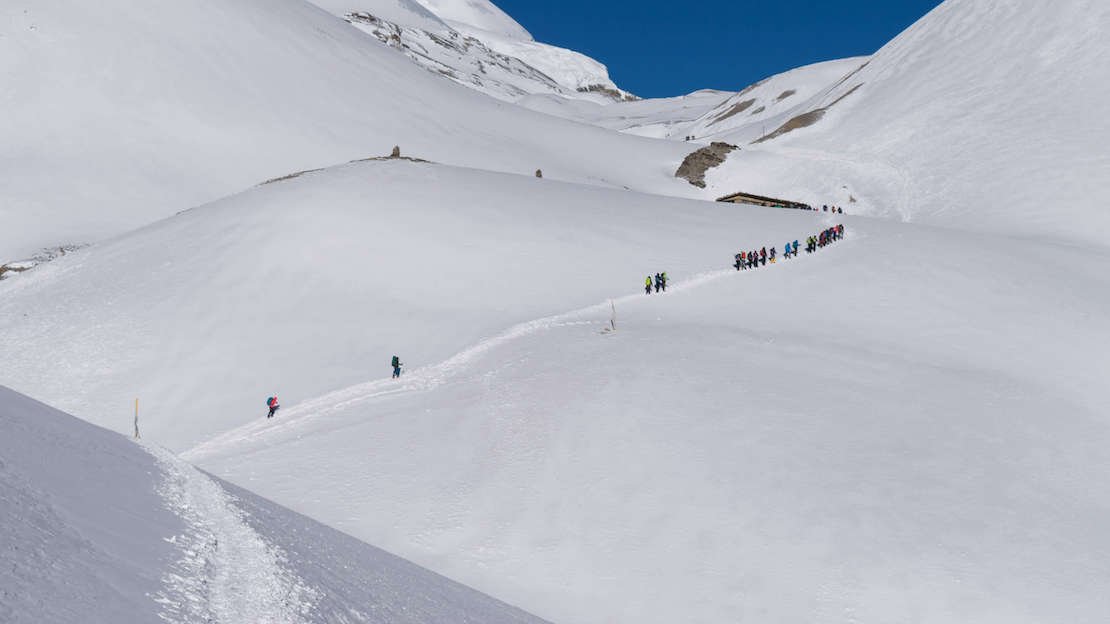
At 3:30, I heard the first people getting ready for the ascent to the pass, but we had decided to wait until sunrise. We started walking at 6:15, and by High Camp, there was hardly anyone left. The first section was not exactly pleasant, with the trail still partly frozen and a cliff on our right.
Getting to the pass was not easy, and we often felt as if we were about to descend, only to face another climb instead. In one of these episodes, my trekking pole even broke. When we finally reached the pass, it was a really great feeling.
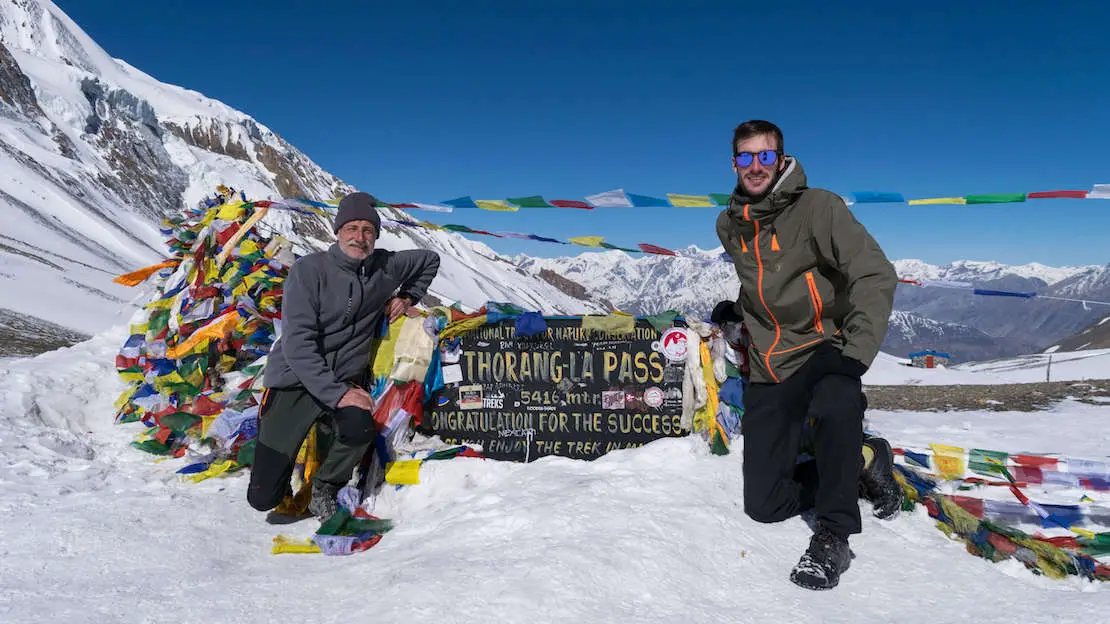
Thorong Pass.
After taking the proper photos, the most difficult part of the day began: the long descent to Muktinath, a 1,600-meter downhill elevation gain. It wasn’t exactly pleasant, especially because of the snow and mud that made the trail extremely slippery.
When we finally arrived at our destination, we found a great room at The Paths of Dream Hotel. Again, hot shower, wifi, and a free room by paying only for meals.
Note: This was the one day when a pair of crampons definitely would have been useful for me. However, it has to be said that it was definitely an abnormal year, and from what I’ve been told, normally in April/May, there isn’t much snow.
As mentioned at the beginning of the guidebook, upon reaching this point, there are several options. We decided to take the bus to Tatopani and start the trek to Poon Hill. But for completeness, I’ll outline the recommended itinerary if you want to complete the circuit on foot.
If you decide to take the bus, these are roughly the prices for major destinations (for jeeps, expect to pay at least double).
Jomsom – 350 rupees – 2 hours
Tatopani – 1200 rupees – 7 hours
Pokhara – 1450 rupees – 12 hours
Upper Pisang.
Day 11. Muktinath – New Jomsom via Lupra (6 hours, 22 km)
Muktinath (3611m) – Lupra (2983m) – Jomson (2784m)
Here you have two options: if you want to completely avoid the road, you have to go through the village of Lupra to the south. The alternative is to go through Kagbeni (which seems to be a beautiful village and was recommended to me) to the north, walking along the road in sections. The scenery (also seen from the bus) is really impressive, and I imagine it is even more so from the path that passes higher up.
Arriving in Lupra, you again have two options: stay at high altitude and walk along the mountainside, or go down to the valley and walk along the river. Both paths rejoin about 5km from Jomsom, where you are obliged to walk on the side of the road.
Bus from New Jomsom:
Tatopani 880 rupees – 5 hours
Pokhara 1110 rupees – 10 hours
Kathmandu 1700 rupees – 20 hours
It is also possible to fly to Pokhara.
Day 12. New Jomsom – Tukuche (4 1/2 hours, 15.5 km)
Jomsom (2784m) – Thini (2836m) – Chhario (2704m) – Tukuche (2615m)
About 500 meters outside the village, you take what was the main road before the new one was built. Essentially, you cross the river and walk all day on the opposite side of the valley from the busy road.
The trail/road involves constant ups and downs until the village of Chhario, from where the path flattens out into a false plain leading to the village of Tukuche.
Day 13. Tukuche – Ghansa (8 hours, 30km)
Tukuche (2615m) – Sauru (2570m) – Kokhethanti (2533m) – Konjo (2700m) – Titi Lake (2700m) – Chhoya Deurali (2505m) – Ghasa (2072m)
Here, there are at least three different options: if you want to completely avoid the road and go through Titi Lake, then it’s about 30km and almost 8 hours of walking. If, once you get to Kokhethanti, you follow the river instead of heading towards the lake, then it’s about 25km. The last alternative is to follow the (busy) road to Larjung and continue along the shortest route shown by organic maps. In this case, it’s about 20km, of which a good part is along the road.
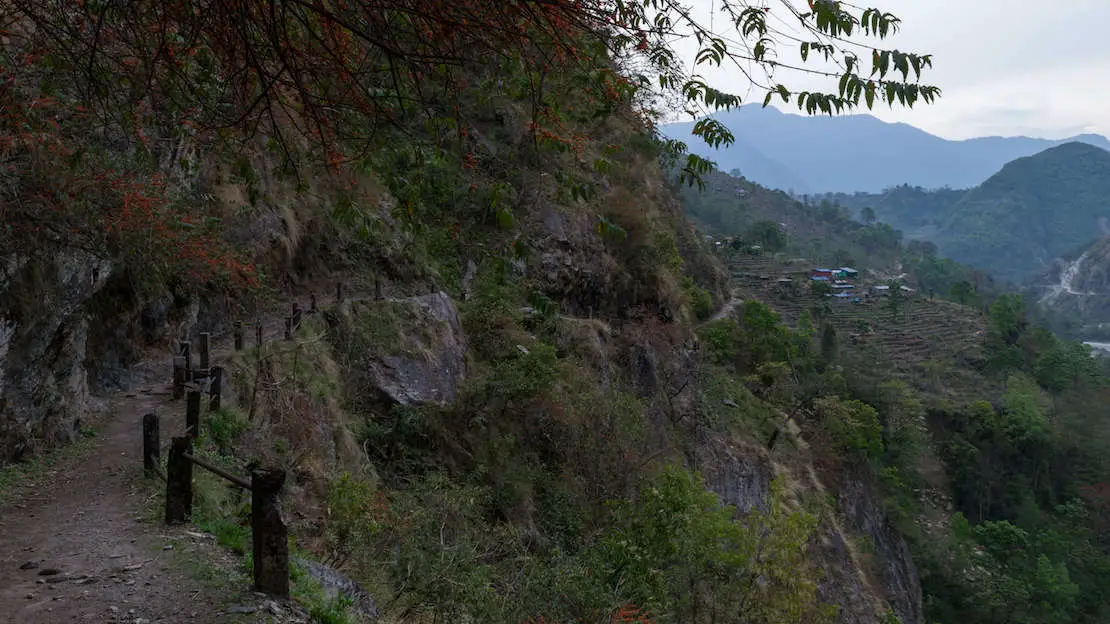
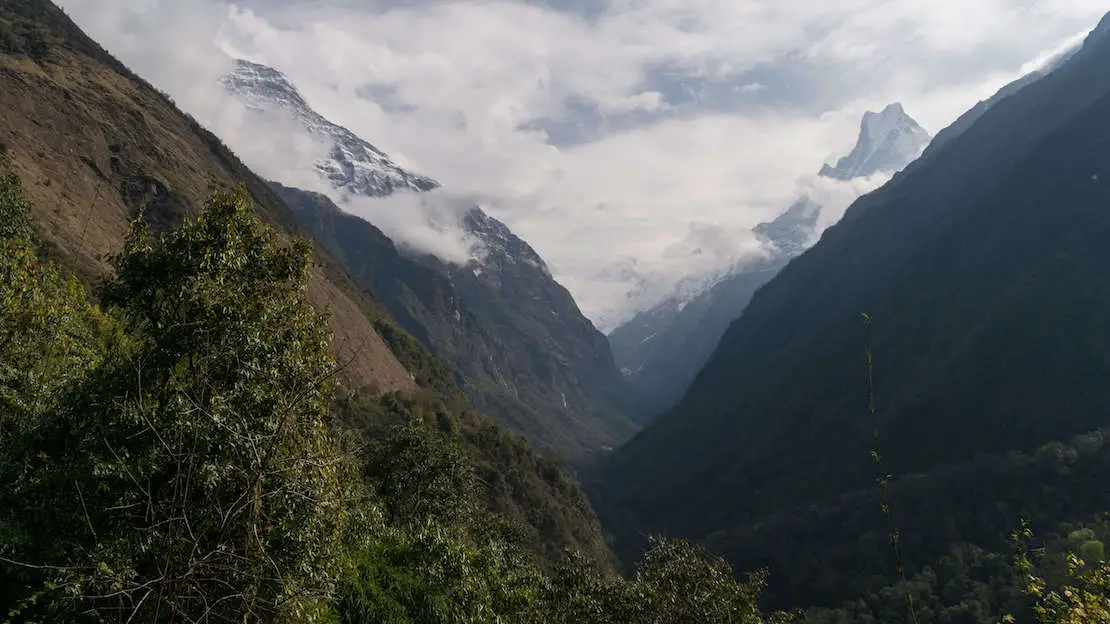
The climb leading to Ghorepani.
Day 14. Ghansa – Tatopani (17km, 5 hours)
Ghasa (2072m) – Pairothapla (1937m) – Kopchepani (1765m) – Narchyang (1448m) – Tatopani (1362m)
Again, you walk most of the time on the opposite side of the river from the main road, except for the last kilometer before you get to Tatopani when you cross the river and have to walk along the busy road.
The village is really touristy and crowded as it is used as a start/finish point for many treks in the area. We arrived by bus from Muktinath, and contrary to what we thought (given the low altitude), finding a free room by paying only for food was impossible. We ended up paying 200 rupees for a double room at Hotel Himalaya, modest accommodation but great wifi and food.
In the afternoon, we visited the nearby hot springs. Nothing impressive, but it was still nice to spend an hour soaking, especially after what had been 10 days of trekking for us. Admission costs 150 rupees.
Day 15. Tatopani – Ghorepani ( 6 hours, 17km)
Tatopani (1362m) – Ghara (1745m) – Shikha (1934m) – Phalate (2272m) – Chitre (2370m) – Ghorepani (2800m)
This is a lot of hard work. It involves 1600 meters of elevation gain and an endless number of steps. Combined with the heat, the day was one of the toughest on the entire circuit. Nevertheless, we arrived at our destination around 2 o’clock and settled at the Lodge Mountain View where, after a bit of negotiation, we managed to get a free room and hot shower in exchange for lunch, dinner, and breakfast.
After walking about 1 km along the main road, you must cross the bridge to the opposite side of the river. From here on, the trail is well-marked and alternates with a virtually traffic-free back road for several kilometers. Then, you will encounter an endless series of steps to the village of Ghorepani. From there, we continued on to Annapurna Base Camp as the circuit route points to Nayapul where the trek ends.
If walking 17 kilometers with 1,600 meters of elevation gain seems too much for you, I recommend spending the night in Shikha, which is literally halfway there.
Ghyaru on the left and Annapurna 2 on the right.
Day 16. Ghorepani – Poon Hill – Nayapul – Pokhara Bus (6 1/2 hours, 22km)
Ghorepani (2800m) – Poon Hill (3200m) – Ghorepani (2800m) – Nangethanti (2524m) – Banthanti (2306m) – Ulleri (2110m) – Tikhedhunga (1536m) – Hile (1554m) – Birethanti (1120m) – Nayapul (1117m)
The first part of the day involves climbing Poon Hill to see the sunrise. From Ghorepani to the top of Poon Hill is only a mile, but it’s almost 400 meters of elevation gain, so it’s not just a stroll. It took us about 40 minutes, so if you want to catch the sunrise, adjust according to the time of year. I recommend starting with a headlamp or at least your cell phone flashlight, but don’t worry, getting lost is impossible; everyone heads up to see the sunrise, and the trail is extremely easy to follow. At the beginning of the trail, there is an entrance fee to Poon Hill, 100 rupees.
Once back in Ghorepani, have breakfast and begin the descent to Nayapul, where the circuit ends. If, however, you want to follow our path and complete the trek to Annapurna Base Camp, then aim for Tadapani.
If you prefer to split this day into two, it’s probably ideal to stop in Ulleri and walk to Nayapul the following day. From Nayapul, there are frequent buses to Pokhara; it takes about two hours and costs about 200-300 rupees. This is where the Annapurna circuit ends.
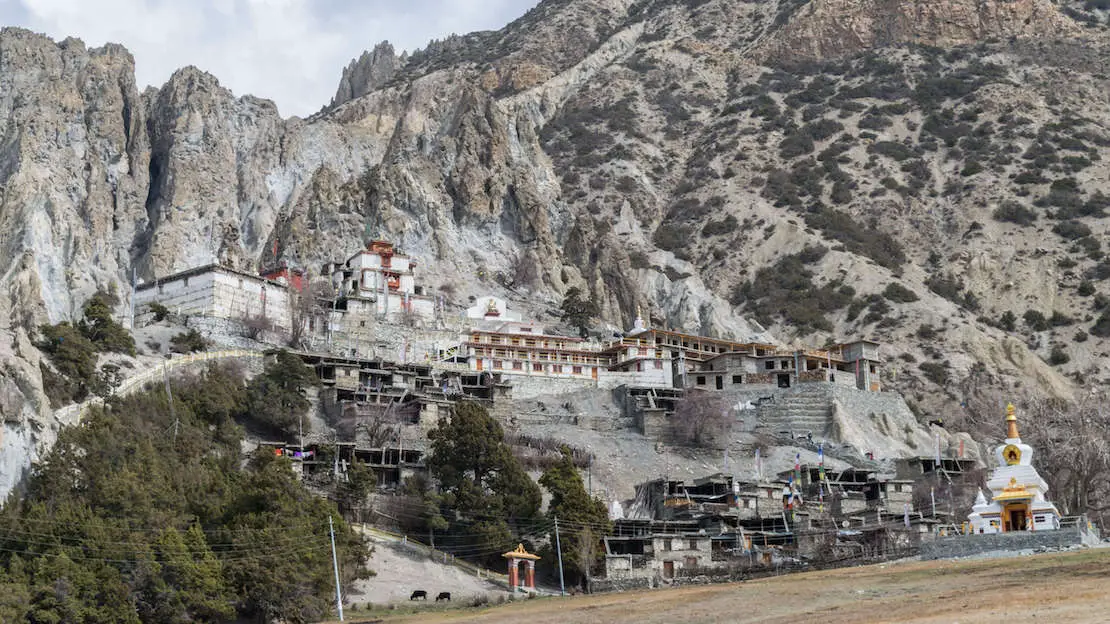
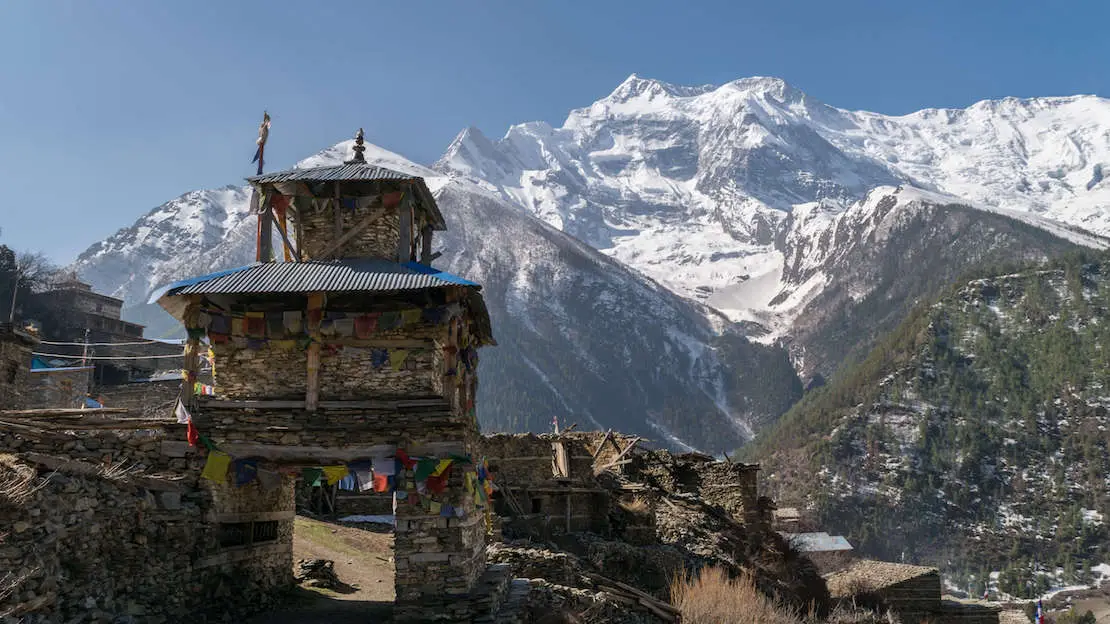
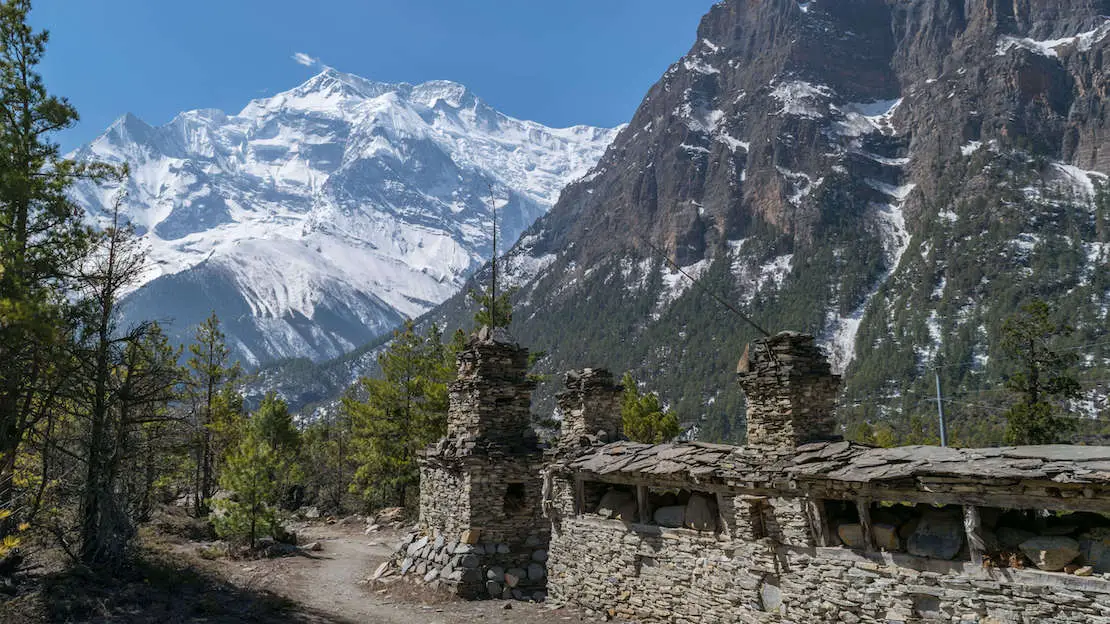
Monastery at the entrance of Manang.
Annapurna Base Camp Trekking
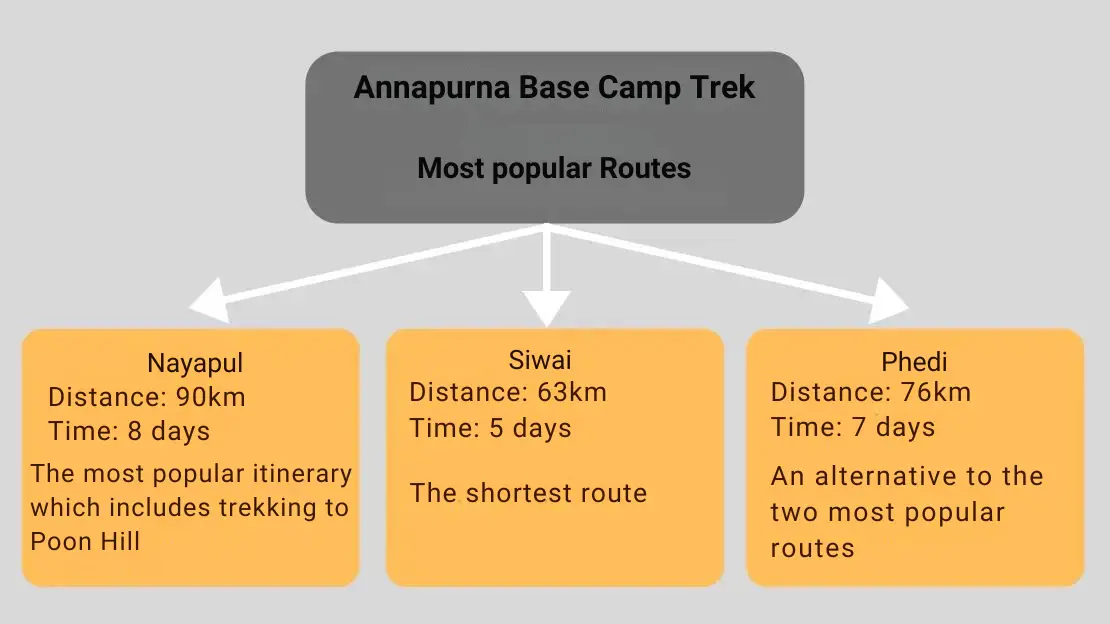
Before we discuss the starting points, here is a complete map of the circuit with the various routes, along with a summary table of the three most popular routes. These routes broadly differ only in the starting point.
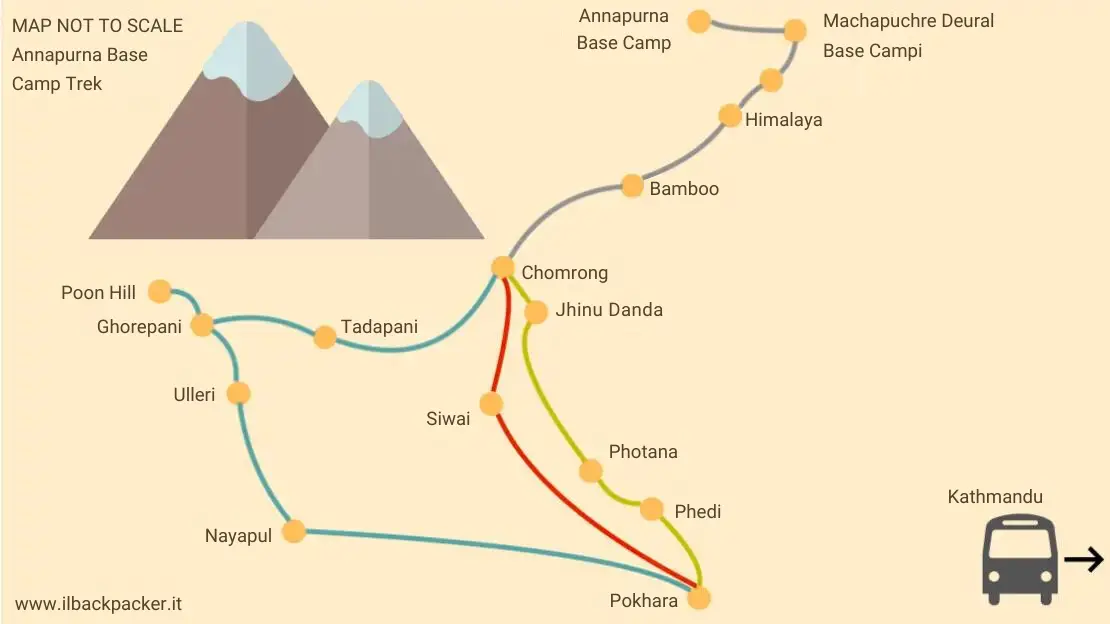
Most Popular Trekking Routes at Annapurna Base Camp.
Basically, if you have time, I recommend starting from Nayapul and incorporating trekking to Poon Hill or from Phedi via Jhinu Danda hot springs. If you are tight on time, however, the best option is to start from Siwai.
In any case, all three starting points can also be used as ending points by combining them at will. For example, you could start from Nayapul and return to Pokhara from Siwai or start from Phedi and return to Pokhara from Nayapul, etc. The choice is entirely up to you and basically depends on how much time you have.
Day-by-day itinerary and recommended stops for Annapurna Base Camp
For convenience, I’ll outline all three of the most popular routes day by day, providing details only for the first route, which covers the route from Chomrong to Base Camp. This stretch is the same in all three routes.
The bus station to the three starting points is also the same. For all cases, I recommend starting early in the morning by taking a taxi to Baglung Bus Park.From the lakeside in Pokhara (the tourist area along the lake where all the hotels/hostels are located), after bargaining, we got a ride for 300 rupees. Alternatively, you can reach there by public transport for a fraction of our price, but we were informed that you have to change buses twice, which we didn’t prefer! It’s also possible to take a jeep to all destinations, but expect to pay at least twice as much.
Another thing to keep in mind is that you can actually stop almost anywhere along the way. The villages are all within a short distance of each other, and the recommended stops can easily be changed to the next village. Additionally, there are many lodges/tea houses between villages, offering endless possibilities to stop in case you are tired or just want to keep walking a little more after arriving at your designated destination. However, stops are more limited at high altitudes.
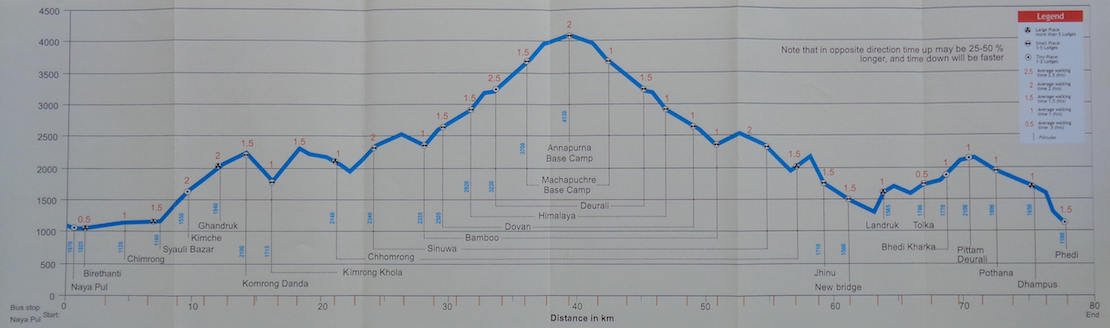
Elevation profile of Annapurna Base Camp Trek.
N.b. All the lodges that were at Annapurna Base Camp were destroyed by an avalanche in early 2019. Currently, the highest point where you can sleep is Base Camp Machhapuchhre a few kilometers down.
Although there are 5 lodges here and we had arrived in the late morning (much earlier than most other trekkers), we were unable to spend the night because they were sold out, and Dad did not want to sleep in the common area. This was in April, which is not even the very high season. So, if you want the security of having a private room to sleep in, I strongly recommend making a reservation in the days before. Any lodge can do it for you. If you are part of an organized tour, of course, there should be no problem.
Annapurna Base Camp trek starting from Siwai in 5 days
This itinerary is designed to complete the trek in the shortest possible time. If you are not particularly fit, are suffering from altitude sickness, or simply prefer to take it easy, feel free to break up the ascent to base camp by adding 1-2 extra stages.
Day 1. Pokhara Bus – Siwai (3 1/2 hours, 50km) / Walk Siwai – Chomrong (4 1/2 hours, 11km)
Siwai (1250m) – Chomrong (2170m)
From Pokhara to Siwai is about 3 1/2 hours, and the ticket costs 300-400 rupees. When you reach Siwai, you briefly walk along the road that basically ends at this village, and then start walking along a really pleasant false flat that passes through several villages.
When you reach Samrung, you cross a long suspension bridge and start a pretty tough climb that ends in Chomrong. During the bus ride, try to keep your permits handy as there is a checkpoint on the way.
We did the route in reverse from Bamboo, so I don’t have any recommendations for accommodation in Chomrong, but I assure you that there are many options available.
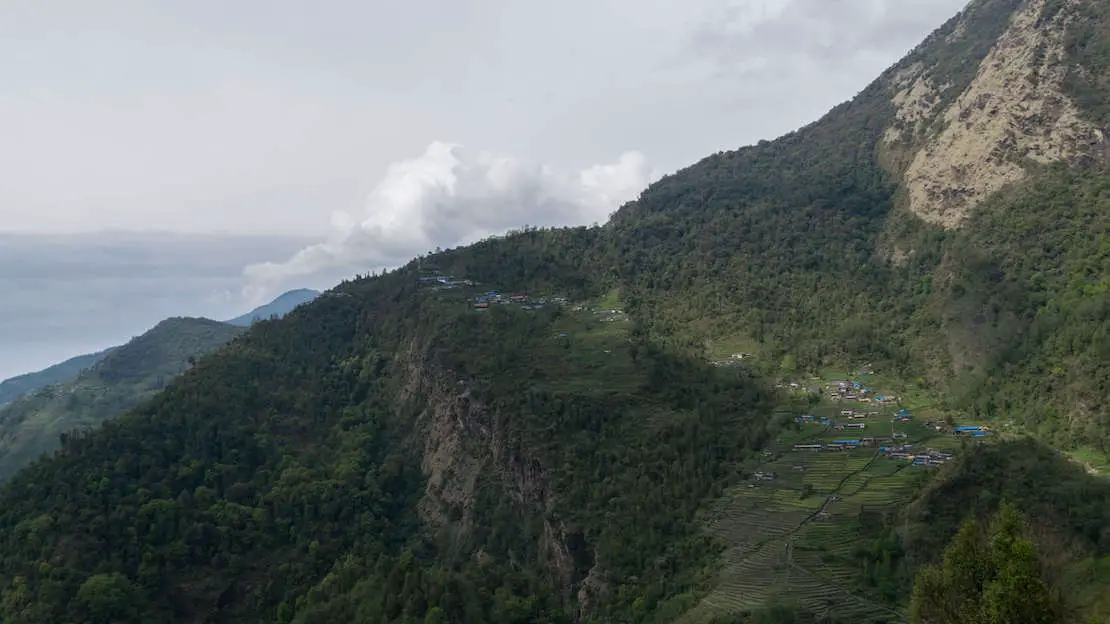
Chomrong village.
Day 2. Chomrong – Himalayas (6 hours, 12 km)
Chomrong (2170m) – Himalayas (2950m)
The day begins with a significant descent to the valley floor, followed by a fairly steady climb to the village of Himalaya. The trail mostly consists of steps through the forest, and while the views are not spectacular in this section, at least the trail is mostly in the shade.
If you don’t feel like walking that far, two possible alternative stops are Bamboo village or Dovan. Here, you cannot negotiate the price of the room; it’s 500 rupees for a double.
Day 3. Himalaya – Annapurna Base Camp – Machhapuchhre Base Camp (6 1/2 hours, 12 km)
Himalayas (2950m) – Annapurna Base Camp (4130m) – Machhapuchhre Base Camp (3700m)
This is by far the most beautiful day of the trek. At Himalaya height, you emerge from the forest and begin to clearly see the peaks surrounding the valley. Upon reaching Deurali, you descend a few hundred meters before embarking on a steady ascent to Machhapuchhre Base Camp. I recommend leaving your backpack at Machhapuchhre Base Camp and continuing on to Annapurna Base Camp to enjoy the spectacular views and capture the mandatory photos before returning to Machhapuchhre Base Camp for the night.
Some people opt to climb to Annapurna Base Camp the following morning, but if visibility is good, I believe it’s better to do it on this day to avoid stretching the next day, even though the chances of better weather in the morning are higher. In any case, the peak is also visible from Machhapuchhre Base Camp. The choice is yours!
Here, you cannot negotiate the price of the room; it’s 500 rupees for a double.
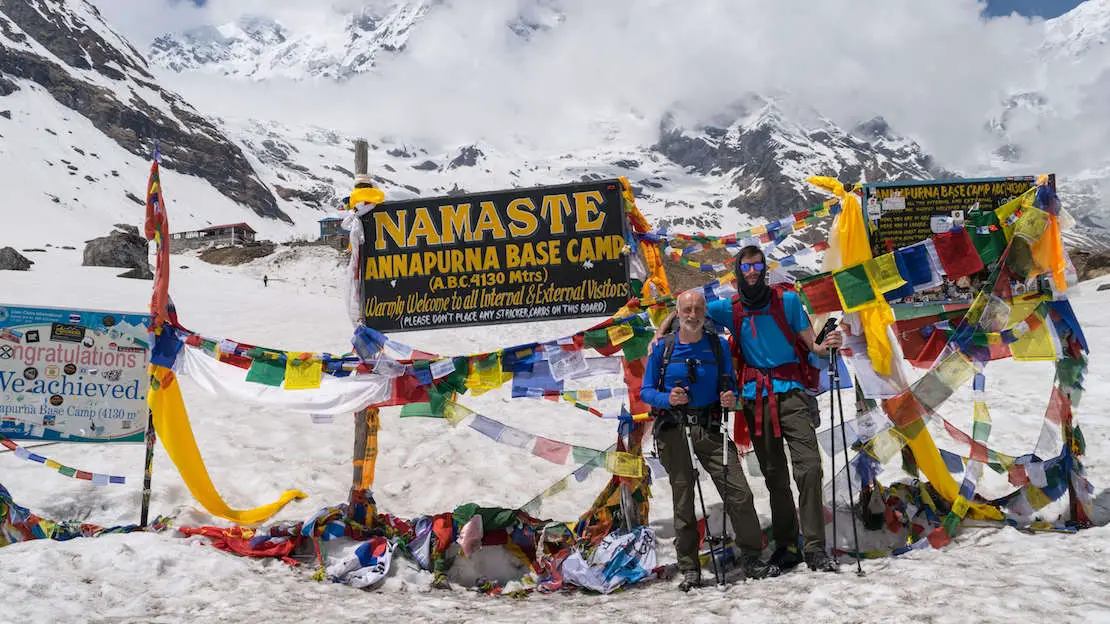
Annapurna Base Camp.
Day 4. Machhapuchhre Base Camp – Bamboo (4 1/2 hours, 11 km)
Machhapuchhre Base Camp (3700m) – Bamboo (2345m)
As just mentioned, you could start the day by going up to Annapurna Base Camp. Alternatively, if you have already done it the previous day, you can start descending to Bamboo. Basically, you walk the whole day downhill along the trail you hiked the previous day. If you arrive at Bamboo and still feel like it, you can decide to go further down to Sinuwa or Bhanuwa to shorten the next day, which is quite long.
Day 5. Bamboo – Siwai (6 1/2 hours, 17 km) / Siwai Bus – Pokhara (3 1/2 hours, 50km)
Bamboo (2345m) – Siwai (1250m)
The descent to Chomrong is really quick, but the staircase to climb back up is endless, and it can get really hot. So, I recommend leaving early in the morning, especially because the last bus to Pokhara is at 4 pm.
The route is again the same as the one taken on the outward journey. Once you get to Chomrong, it’s pretty much downhill all the way to Siwai, where you can take the bus/jeep or even a taxi back to Pokhara. Again, remember to keep your permits handy as you stop at the same checkpoint as on the way out.
At Bamboo, it is possible to get a free room by paying only for meals. The Buddha Guest House is not bad, and the nice lady is more than willing to bargain.

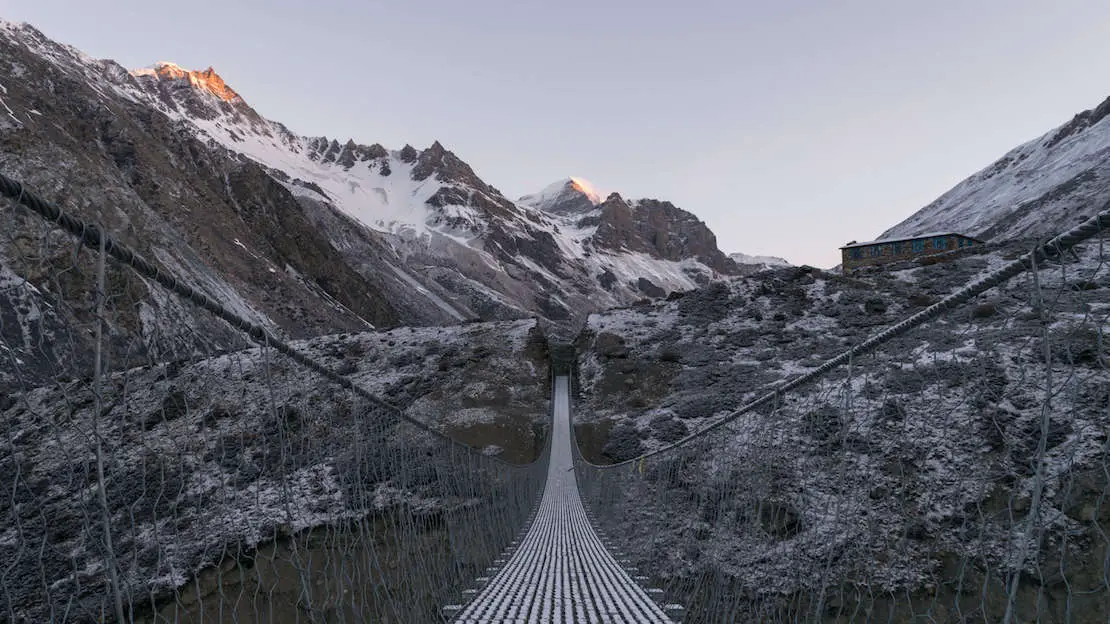
Suspension bridge between Bamboo and Siwai.
Annapurna Base Camp trekking plus Poon Hill starting from Nayapul in 8 days
This itinerary is primarily designed to combine trekking to Poon Hill first with trekking to Annapurna Base Camp later. If you prefer, you can also head directly to Annapurna Base Camp from Nayapul by essentially following the itinerary described starting from Siwai, with an additional day of walking. However, personally, I don’t think it makes much sense, as you’ll be walking along the road, and the scenery is certainly not spectacular.
Day 1 Bus Pokhara – Nayapul (2 and a quarter hours, 40km) / Walk Nayapul – Ulleri (4 hours, 12km)
Nayapul (1117m) – Birethanti (1120m) – Hile (1554m) – Ulleri (2110m)
The bus from Baglung Bus Park to Nayapul costs 200 rupees. Once you arrive at your destination, walk through the village and cross the bridge towards Birethanti. Here are the first two check points where you have to show your permits.
From here on, the route to follow is pretty obvious but you can always help yourself with Organic Maps. The first part is along the road, then it is all trail until the village of Hile where you could spend the night if you want to. I recommend continuing on to Ulleri because the Hile – Ullerri section is quite hard and takes about 2 hours.
Day 2. Ulleri – Ghorepani (3 hours, 8 km)
Ulleri (2110m) – Banthanti (2210m) – Nangethani (2430m) – Ghorepani (2780m)
This is a fairly short day, so you can leave at a leisurely pace unless you have stopped further downstream. The trail passes through the forest and several villages, crossing waterfalls and streams. The entire route is basically uphill. At Lodge Mountain View, after some negotiation, we managed to get a free room and hot shower. We only paid for lunch, dinner, and breakfast.
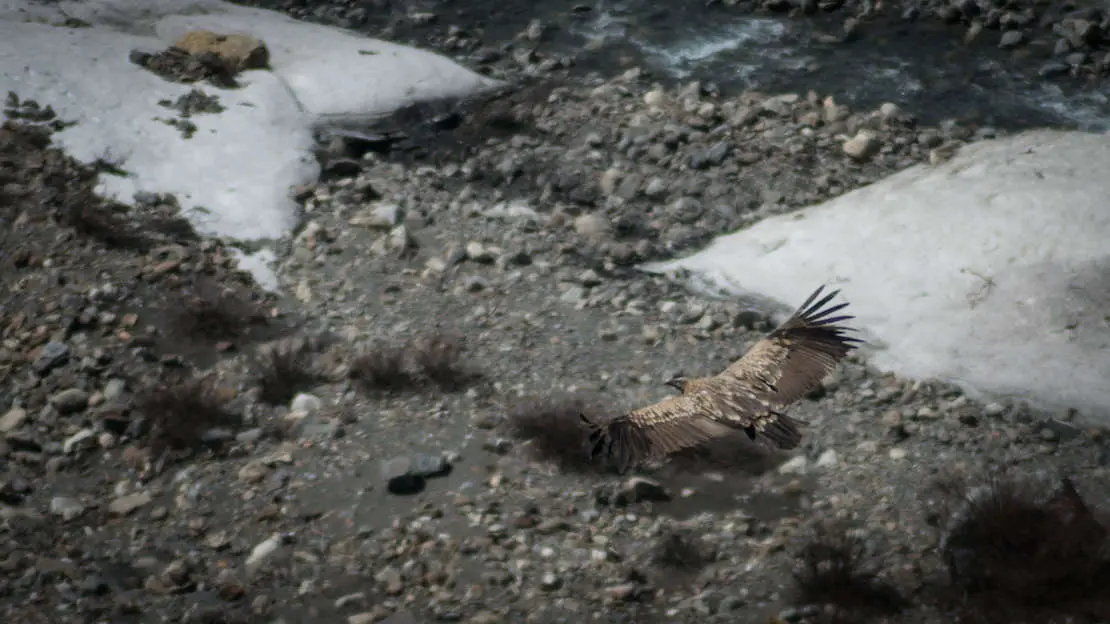
Himalayan eagle.
Day 3. Ghorepani – Poon Hill – Tadapani (3 hours, 8.3 km)
Ghorepani (2780m) – Poon Hill (3200m) – Ghorepani (2780m) – Tadapani (2630m)
The first part of the day consists of climbing Poon Hill to see the sunrise. From Ghorepani to the top of Poon Hill is only a mile, but it’s almost 400 meters of elevation gain, so it’s not really a leisurely walk. It took us about 40 minutes, so if you want to see the sunrise, adjust according to the time of year.
I recommend starting with a headlamp or at least a cell phone flashlight. But don’t worry, getting lost is impossible; everyone goes up to see the sunrise, and the trail is extremely easy to follow. There’s an entrance fee to Poon Hill, 100 rupees, right at the beginning of the trail.
Once back in Ghorepani, have breakfast and begin the ascent to the pass, from where you have fantastic views of the Annapurna massif. Then, there’s a continuous ascent and descent to Tadapani. The next day, you reach Chomrong, from where you can follow the route just described and return to Pokhara from Siwai, essentially doing the following.
Day 4. Tadapani – Chomrong (3 1/2 hours, 9.3 km)
Tadapani (2630m) – Chomrong (2170m)
The distance is short, but it’s all up and down, quite tiring. At least you’re walking most of the time in the shade of the forest. If you wanted, you could combine days 3 and 4 into one long day of walking, thus reducing the itinerary to 7 days. But if you have time on your hands, I don’t see the need to do that.
Day 5. Chomrong – Himalayas (6 hours, 12 km)
Chomrong (2170m) – Himalayas (2950m)
Day 6. Himalaya – Annapurna Base Camp – Machhapuchhre Base Camp (6 1/2 hours, 12 km)
Himalayas (2950m) – Annapurna Base Camp (4130m) – Machhapuchhre Base Camp (3700m)
Day 7. Machhapuchhre Base Camp – Bamboo (4 1/2 hours, 11 km)
Machhapuchhre Base Camp (3700m) – Bamboo (2345m)
Day 8. Bamboo – Siwai (6 1/2 hours, 17 km) / Siwai Bus – Pokhara (3 1/2 hours, 50km)
Bamboo (2345m) – Siwai (1250m)

Annapurna Summit.
Annapurna Base Camp trek starting from Phedi in 7 days
This route is probably the least popular itinerary/starting point of the three, but definitely lends itself well to visiting the hot springs of Jhinu Danda.
Day 1 Bus Pokhara – Phedi (about 1 hour, 18km) / Walk Phedi – Photana (about 3 hours, 7 km)
Phedi (1130m) – Photana (1990m)
The bus from Baglung Bus Park to Phedi costs 100/200 rupees. Once you arrive at your destination, walk in the direction of Dhampus and then continue through the forest to Pothana. The entire stretch is slightly uphill.
Day 2. Photana – Jhinu Danda (about 5 hours, 13 km)
Photana (1990m) – Jhinu Danda (1720m)
The first section is uphill to the village of Pittam Deurali, then follows a descent to the bottom of the valley before climbing again to Jhinu Danda, where you can spend the afternoon relaxing at the hot springs.
Having not personally taken this route, preferring instead the route to Siwai, I do not know if it is really worth visiting the hot springs. In any case the reviews do not seem bad.
Along the trail leading to Base Camp.
Day 3. Jhinu Danda – Bamboo (about 5 hours, 9.4km)
Jhinu Danda (1720m) – Bamboo (2345m)
From Jhinu Danda, you head towards Chomrong and join the standard route to Annapurna Base Camp. On the way back, it’s probably preferable to head to Siwai to save a day’s walk. Of course, you could also retrace the same path as on the way out and return to Pokhara from Phedi. In any case, the itinerary may look something like this.
Day 4. Bamboo – Deurali (3 1/2 hours, 7km)
Bamboo (2345m) – Deurali (3220m)
Day 5. Deurali – Annapurna Base Camp – Machhapuchhre Base Camp (5 1/2 hours, 12 km)
Deurali (3220m) – Annapurna Base Camp (4130m) – Machhapuchhre Base Camp (3700m)
Day 6. Machhapuchhre Base Camp – Bamboo (4 1/2 hours, 11 km)
Machhapuchhre Base Camp (3700m) – Bamboo (2345m)
Day 7. Bamboo – Siwai (6 1/2 hours, 17 km) / Siwai Bus – Pokhara (3 1/2 hours, 50km)
Bamboo (2345m) – Siwai (1250m)

The trail from Ghorepani to Tadapani.
Poon Hill Ghorepani Trek
Some people choose to start from Kimche (near Siwai) and end in Nayapul, but the classic itinerary is the one done in reverse, which is essentially the same itinerary described above: “Annapurna Base Camp Trekking plus Poon Hill starting from Nayapul in 8 days.”
Regardless of whether you decide to start from Kimche or Nayapul, I recommend beginning the first day of the trek early in the morning with a cab to Baglung Bus Park. From the lakeside in Pokhara (the tourist area along the lake where all the hotels/hostels are located), it takes about 10 minutes and costs 300 rupees. Alternatively, you can use public transport, but it involves a couple of changes, and we preferred the convenience of a taxi.
 Day by day itinerary and recommended stops for Trekking in Poon Hill Ghorepani
Day 1 Bus Pokhara – Nayapul (2 and a quarter hours, 40km) / Walk Nayapul – Ulleri (4 hours, 12km)
Nayapul (1117m) – Birethanti (1120m) – Hile (1554m) – Ulleri (2110m)
The bus from Baglung Bus Park to Nayapul costs 200 rupees. Once you arrive At your destination, walk through the village and cross the bridge towards Birethanti. Here are the first two check points where you have to show your permits.
From now on, the route is fairly obvious to follow but you can always help yourself with Organic Maps. The first part is along the road and then it is all trail to the village of Hile where you could spend the night if you want to. I recommend continuing on to Ulleri, the section from Hile to Ulleri is quite hard and takes about 2 hours.
Day 2. Ulleri – Ghorepani (3 hours, 8 km)
Ulleri (2110m) – Banthanti (2210m) – Nangethani (2430m) – Ghorepani (2780m)
This is a relatively short day, so you can set off at a leisurely pace unless you’ve stopped further down. The trail winds through the forest and several villages, crossing waterfalls and streams. The entire route is mostly uphill.
At Lodge Mountain View, after some negotiation, we managed to secure a free room and a hot shower by agreeing to have lunch, dinner, and breakfast there.
Day 3. Ghorepani – Poon Hill – Tadapani (3 hours, 8.3 km)
Ghorepani (2780m) – Poon Hill (3200m) – Ghorepani (2780m) – Tadapani (2630m)
The day is essentially divided into two parts. The first involves ascending to Poon Hill to witness the sunrise. From Ghorepani to the top of Poon Hill is only a mile, but it entails almost 400 meters of elevation gain, so it’s quite a climb. It took us about 40 minutes, so adjust your timing according to the time of year if you wish to catch the sunrise.
I highly recommend starting with a headlamp or at least a cell phone flashlight. However, don’t worry about getting lost; the trail to Poon Hill is well-marked and extremely easy to follow. There is an entrance fee of 100 rupees at the beginning of the trail.
After returning to Ghorepani, have breakfast and embark on the ascent to the pass. From there, you’ll have fantastic views of the Annapurna massif. Following this, there’s a continuous ascent and descent to Tadapani. The next day, you’ll reach Chomrong, from where you can follow the route previously described and return to Pokhara via Siwai.
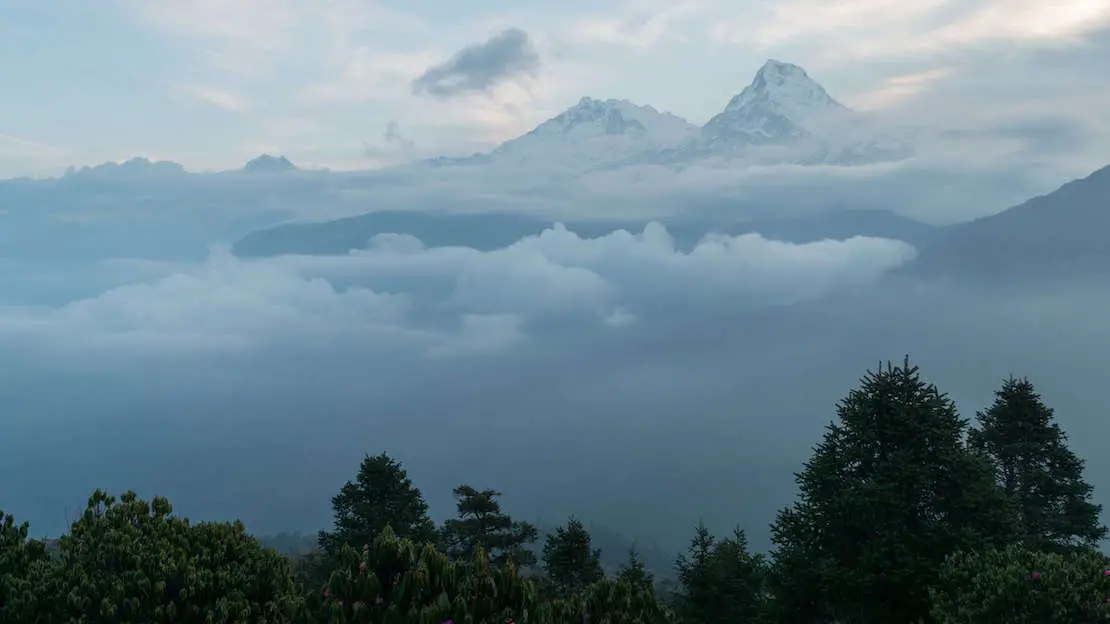
Sunrise at Poon Hill.
Day 4. Tadapani – Kimche (3 hours, 9 km)
Tadapani (2630m) – Kimche (1550m)
The distance is short, as you mainly descend through the forest. Upon reaching Ghandruk, you can have lunch, enjoy the view, and then descend further to Kimche, where you can catch a jeep or bus back to Pokhara.
If you haven’t already, you can easily combine the trek to Poon Hill with the trek to Annapurna Base Camp, as outlined in the relevant section.
If you found this article helpful, please consider purchasing your travel insurance through one of the links you find on the blog to support my work at no additional cost to you. The insurance I recommend for this type of trip is TrueTraveller, adding the “Extreme Pack” package offers coverage for treks above 4600 meters. Alternatively, sign up for SafetyWing and add the “Adventure Sports” package which offers coverage up to 6000 meters.
What to bring for the Annapurna Circuit Trekking, Base Camp and Poon Hill
All three treks require basically the same equipment, and since camping is not necessary, you won’t need much. Here is the complete list of equipment and clothing.
Backpack – 50 liters is more than enough, but if you decide not to carry a sleeping bag, 40 is probably enough. Dad used his Berghaus TrailHead 50 while I used my Kelty Redwing 50 travel backpack, both are excellent backpacks – the former specifically for hiking, the latter is a hybrid.
Smartphone – The trails are well marked but having organic maps handy can definitely help in certain situations.
LifeStraw, water filter or water bottle with filter– All three are viable options that will save you quite a bit of money. At altitude, a water bottle can cost up to 300 rupees. I do not recommend tablets, as in my opinion are impractical and expensive in the long run.
Headlamp – Most lodges have lights in the room and you would probably be able to get by with just your cell phone. However, having a headlamp is more convenient especially if you want to see the sunrise at Poon Hill or start walking early, for example on Thorong Pass day.
Sleeping Bag – We both brought it and did not regret it but you could potentially do without it especially if you plan to do the trek to Poon Hill only. Lodges always provide at least one blanket and you can often get a second one for free which is sufficient in most situations but I would also bring a light sleeping bag for a hygiene issue.
Buff – Useful for both cold and sun protection, I personally never leave without my merino wool buff that I also use for dust/smog. If you are not a fan of the buff, I recommend bringing a hat, the sun can really do damage.
Base layer – Never used during the day but really useful in the evenings in lodges, and as pajamas to go to sleep, light and unobtrusive.
Synthetic towel – Practical, lightweight and dries quickly.
Waterproof case – Keep your documents and permits safe from water.
Kindle paperwhite – Obviously not necessary but both Dad and I were more than happy to have it during the afternoons spent relaxing in the lodges.
Sunglasses – Better if polarized.
Map – We completed all the treks without a physical map but it might come in handy. In Pokhara/Kathmandu it costs no more than 400 rupees.
Power Bank – You can almost always recharge for free in the lodges but at high altitudes you have to pay and having a power bank can save you quite a bit of money. 10000mah is more than enough if you just need to recharge your cell phone.
First Aid Kit-Buy one already pre-packaged or prepare it yourself.
Hiking shoes – One pair of hiking shoes is more than enough to complete all routes but if you prefer boots, opt for a lightweight pair. I used a pair of Columbia Peakfreak, while Dad used a pair of Salomon LTR GTX.
Sleepers – Really comfortable in the evening to let your feet breathe a bit and take a shower. I do not recommend flip-flops as they are uncomfortable to wear with socks which are necessary at high altitude.
Merino wool socks – Nothing beats merino wool when it comes to hiking socks. At least 2 – 3 pairs so you can manage to wash them.
Light crampons – We didn’t have them, but they would have come in handy on the day of Thorong Pass and the day of Annapurna Base Camp. However, it’s worth mentioning that usually in April (when we did the trek), there should be no more snow. It varies from year to year and depends on the time of year you choose to do the treks. In fall and late spring, I think they are always unnecessary.
Trekking poles – I think you don’t need to spend a fortune. In case you are a skeptic of trekking poles, I invite you to think again, especially on long distances they help a lot.
Down jacket – If you complete the circuit or reach the base camp during colder weather, these jackets really come in handy. They take up little space and keep you very warm.
Mid Layer – In the evening, and also while walking at higher altitudes, it’s not particularly warm, so having a warmer layer is really comfortable. I wore mine pretty much every night.
Waterproof jacket or Poncho – In over 20 days, we have only caught rain once but it is always better safe than sorry.
Beauty case – Sunscreen, chapstick, bar of soap (good for doing laundry too), toothbrush, toothpaste, deodorant and toilet paper (never provided by lodges).
To all this, I would add 2-3 synthetic T-shirts that dry really fast once washed, a pair of lightweight convertible pants (girls might opt for a pair of leggings) and a pair of thicker pants for use in the evenings or on colder days at high altitudes, and finally 3 pairs of underwear.
This is basically everything you need for trekking but you can always check out my complete list of things to bring on your trip so you don’t forget anything at all.
Obviously, it is not absolutely necessary but I personally try to always put my body in the best possible condition and having some electrolytes on hand (low altitude can get really hot and you sweat a lot), some magnesium to take in the evening to relax the muscles and maybe some omega 3 to fight inflammation especially after 10 to 20 days of trekking would not hurt at all.
Manang village.
Guide, porter or DIY
Those who know me are aware that I’m a huge fan of DIY, and I only rely on organized tours or guides if it’s absolutely necessary. I prefer this approach because I genuinely enjoy the process of organizing, and it’s usually the most economical option. However, I completely understand those who prefer a more relaxed vacation without as much hustle.
For completing the treks, having a guide isn’t absolutely necessary. The routes are well-marked, and getting lost is virtually impossible. On the rare occasions when you might have doubts, especially along the less-traveled second part of the circuit, having organic maps on hand should resolve any uncertainties.
If you would like to opt for an organized tour, GetYourGuide offers a couple of options that you can book directly from home but the alternative is to use a local agency once you arrive in Kathmandu where you would definitely save some money, in any case expect to pay at least twice as much as DIY.
A good compromise might be to hire a porter/guide by inquiring at various agencies in Pokhara and Kathmandu, or even along the route where signs at lodges often advertise “Porters and guides available.” This option is likely even more economical.
In any case, I’ve seen many couples rely on a single individual who essentially assists with carrying most of the weight while also acting as a guide. The cost is typically about $20 a day, and they can carry up to 20-25 pounds, which I believe is suitable even for three people. Usually, the price includes their room and board as well.
Food and lodging overview of the Annapurna Circuit Treks, Base Camp and Poon Hill
Let’s begin by discussing the lodges (sometimes called teahouses) encountered along the way, which pleasantly surprised me. Virtually every lodge we stayed in had WiFi, hot water, and electricity. Although these services are often charged for at high altitudes, the fact that they are almost always available was a real surprise.
At least one nice, thick blanket is also always provided, and you can request a second blanket without incurring extra charges. Since we had sleeping bags, we never needed one. The only time I saw a sign indicating an extra blanket charge was in High Camp, which is also the only place where the bathroom was a latrine. But at 4900 meters, I think that’s acceptable! In all the other guesthouses, the bathrooms were always decent. Sometimes there are toilets, but often there are squat toilets with a bucket for flushing water.
The rooms are really simple and mostly consist of two single beds and a small bedside table in the middle. At lower altitudes, it is also possible to have an en-suite bathroom. Then there is always a common area that basically serves as a dining area. This is also the only room heated in the evening when the altitude requires it.
In conclusion, don’t expect luxury hotels, but the accommodations are absolutely decent. Of course, the higher you go, the more basic they become. Power outlets disappear from the rooms, hot showers, and WiFi start to incur charges, and so on.
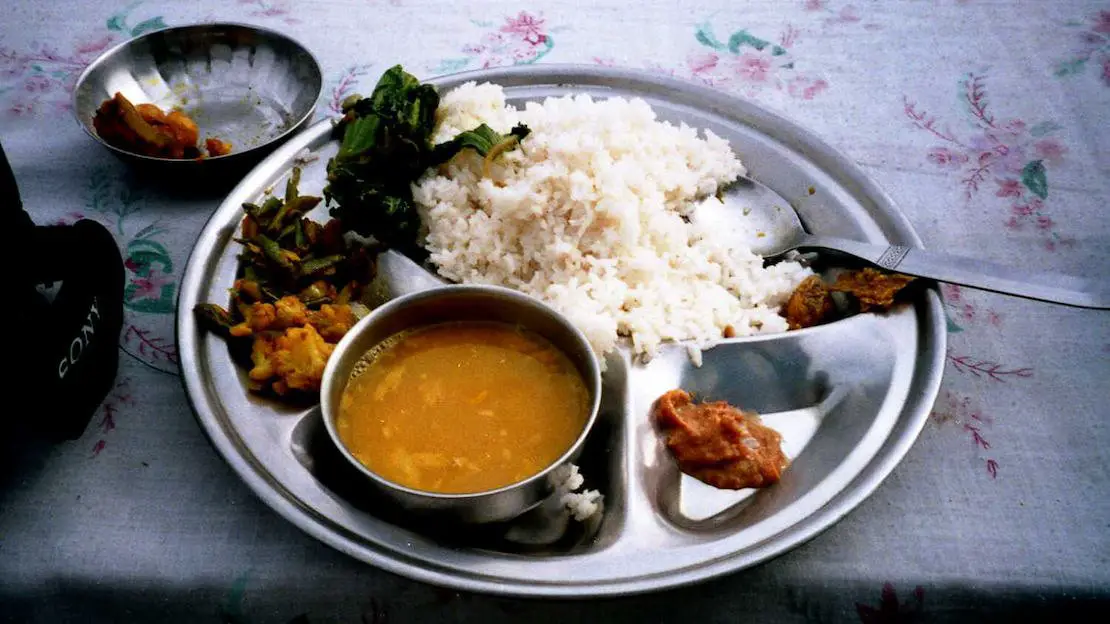
A plate of Dal Bhat.
On the other hand, the food offered is consistent throughout the journey. The cuisine offered mainly includes Nepalese, Indian, Chinese, and some Western dishes. The menus usually offer noodles, rice, or stir-fried noodles with vegetables/chicken/beef/eggs/cheese, boiled eggs/omelets, dal bhat (a typical local dish with rice, vegetables, and lentil soup), various soups (tomato, egg, potato, garlic, vegetable, chicken, noodles, etc.), pizza, pancakes, porridge, muesli, different kinds of tea, coffee, and various drinks.
N.b. I do not recommend meat to avoid stomach problems, as the preservation methods may not be the best.
As you can see, there is quite a variety, but we personally often ended up eating two servings of dal bhat a day, which is by far the best dish in terms of cost/quantity, since you can often go on and on getting your plate refilled as many times as you want.
As for water, some villages offer safe filling stations that guarantee the potability of the water, which is definitely a more environmentally friendly solution than plastic bottles. As mentioned above, I strongly recommend one between LifeStraw, water filter, and water bottle with filter-you save money and don’t have to rely on filling stations.
Overview costs of the Annapurna Circuit Treks, Base Camp and Poon Hill
Food
Breakfast (porridge, omelet, muesli)
At low altitude: 300 to 400 rupees.
At high altitude (above 3000 to 3500m): 500 to 600 rupees.
Lunch/dinner (sautéed rice, pizza, pasta, dal bhat etc etc)
At low altitude: 450 to 500 rupees.
At high altitude (above 3500m): 700 to 800 rupees.
Soups
At low altitude: 200 to 250 rupees.
At high altitude (above 3500m): 300 to 450 rupees.
Tea
At low altitude: 50 rupees.
At high altitude (above 3500m): 120 rupees.
Water
At low altitude: 50 to 100 rupees.
At high altitude (above 3500m): 200 rupees.
As mentioned several times in this guide, I strongly recommend a LifeStraw or water filter or water bottle with filter.
Accommodation
Lodging is really cheap, often even free if you consume 2-3 meals, especially if you have the will to bargain. For example, we only paid for the room at High Camp (350 rupees each) and Deurali (500 rupees for a double).
Two or more people certainly gives you an advantageous position when negotiating prices, but even alone at low altitude, you can easily sleep for free or at least pay no more than 100-200 rupees.
Along the route to the base camp, the lodges are definitely more reluctant to give the room away for free, especially from Bamboo onwards. I guess given the large turnout of people, they fill up anyway .
Classic lodge along the trail.
Total cost of our trek (Circuit + Poon Hill + Base Camp)
In conclusion, the cost of our trek, including two days in Kathmandu (before and after the trek), permits, food, lodging, and transportation (basically everything over the 22 days except the visa to enter the country), was €310 per person, which translates to about €15 per day per person. If you are traveling alone, you will probably end up spending a little more, and the same goes if you indulge in alcoholic beverages or other luxuries.
I recommend, in any case, starting the trek with the equivalent of at least €20 in rupees in cash. Along the way, there are definitely ATMs in Besisahar and Jomsom, but I would not rely on them too much, as paying with a card is practically impossible.
Get your cash in Kathmandu or Pokhara. Nabil Bank allows you to withdraw up to 35,000 rupees with a fee of 500 rupees, while Standard Chartered Bank allows you to withdraw up to 25,000 rupees with no fees. These are the two best options for withdrawing money.
For more information on which cards to use abroad (without spending a fortune in bank fees) I strongly recommend you check out this article.
Safety along the Annapurna Circuit Trekking Trails, Base Camp and Poon Hill
The entire area (and Nepal more generally) is extremely safe. We never felt threatened, and the locals were incredibly friendly and helpful throughout our journey. The trails are well-marked and well-maintained, making them easy to follow. However, as mentioned several times, you can always consult organic maps if you have any doubts.
The only real danger may be the altitude, especially if you decide to complete the circuit. You may experience so-called mountain sickness. After reaching 3000 to 3500 meters, some people may start to feel symptoms such as lack of appetite, difficulty breathing, headache, difficulty sleeping, fatigue, vomiting, etc.
Here are four useful tips:
1. The most important rule of all is to avoid overdoing it. Climb at a steady pace. Ideally, climb more slowly than you feel you could sustain.
2. Don’t underestimate the symptoms. If you experience a slight headache before bedtime and feel fine the next day, there is no problem. But if the symptoms persist, avoid gaining altitude again. Often, a day of acclimatization/rest is more than enough to continue. In some cases, it is advisable to descend a few hundred meters and, once you feel better, resume the ascent. Basically, never continue climbing if you feel sick.
3. After reaching 3000 meters, it is recommended to never sleep more than 500 meters above the previous night’s altitude. To be honest, we often exceeded this recommendation without any problems. In any case, I would limit myself to 700/800 meters at most.
4. Drink lots of water. Staying hydrated is essential.
There are also some medications, such as Diamox, that help prevent altitude sickness. However, I have no experience with them. In my opinion, it is better to listen to your body instead of relying on medications.

Where to sleep in Kathmandu and Pokhara
It is highly likely that during your trip to Nepal, you will need to spend at least one night in one of the two cities. Here are some accommodations that might suit you.
Kathmandu
I spent two weeks in Kathmandu, trying out several accommodations, first with Dad and then on my own while waiting for my visa to India. Here are my recommendations.
Gurung’s Home – Good prices for both dorm and private rooms.
The Sparkling Turtle Backpackers Hostel – Great hostel at a very good price with really nice staff. The only downside is the location, it is in fact about 3km from the center of Thamel near the Monkey Temple, otherwise, it is highly recommended.
Andes House – Clean and inexpensive private rooms right in the center of Thamel.
Pokhara
HOTEL FORESTWAY Hostel & Backpackers – Good budget hostel 50 meters from the lake that also offers private rooms.
Hotel Santana – If you are exclusively looking for an affordable private room to sleep in before or after your trek, look no further.
If you found this article helpful, please consider purchasing your travel insurance through one of the links you find on the blog to support my work at no additional cost to you. The insurance I recommend for this type of trip is TrueTraveller, adding the “Extreme Pack” package offers coverage for treks above 4600 meters. Alternatively, sign up for SafetyWing and add the “Adventure Sports” package which offers coverage up to 6000 meters.
For donations/pizzas and virtual beers 🙂
Did you like the post? Pin it!